Showing posts with label e-paper. Show all posts

2025-03-24

More on e-paper

I have learned some lessons, so sharing with you.

The 7.5" e-paper are fun, I have loads of them with the nice laminated glass and black border to sell, plug, plug!

But the story of making e-paper work is not simple.

Software

This I am good at, and the latest code allow a range of widgets and extracted values to be displayed in various ways on the display.

Hardware

This is where I am also always learning. To explain, even in software, where I have being doing this for what 50 year, and have a degree, even now I learn lessons.

But hardware is more challenging for me - my formal training is less, but not nonexistent.

But the real challenge is the turn around time - software I can recompile and try in minutes - hardware is days or weeks to try out as a proper PCB, days if I solder and don't have the components yet. I have done milled PCBs which make that easier in a way, well, quicker, at least.

Symptoms

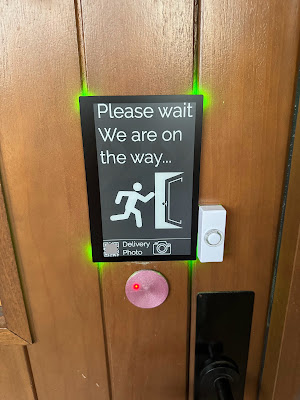
So..., what happened? The issue was with the larger 7.5" e-paper displays which I have used for years - I have on my doorbell display and my fridge. There is one at the Indian restaurant and two at the pub. They work flawlessly.

What happened is trying one for some other people, and they wanted a displayed image, and that created "smearing" over the display. It looked shit.

It seems some graphics, and I have concluded it is those with a lot of black/white transitions across the display line, break down in an odd way.

The fix?

I assumed it was me, and did loads and loads of tinkering with different LUT settings, and temperature compensation settings and VCOM calibration settings and all sorts.

I got it working OK, but it created a new problem!

Fading and burn in!

It is not actual "burn" in as such but it has the same effect - a lingering image. What is worse was random fading - even 1 minute updates would fade away showing burned in images within seconds. But only some times.

Two factors - one was not doing a POF command, and that creates massive burn in within hours. Even now, at the right angle, on some of my test panels, I see that I tried this on "MONDAY". Do not do that ever!

The other is the LUT was working to push the KK and WW frames a lot, and that left the panel in some state with a charge that meant any change could leave this fading effect.

The effect would eventually dissipate if the display was constant but it could take hours.

This was clearly not the fix I had hoped for.

Henry

So what was the answer? Well, if resistance is futile, inductance is king!

The boost circuit I was using was based on a known working design and used a 10uH inductor. But that was for a watch, a small e-paper display.

The reference circuit Waveshare do has a 68uH inductor. I tried that, it helped massively.

But testing showed that bigger is better! So now it is a 470uH inductor. And that is amazing.

I can do normal changes and updates with no smearing effects in any way. My fudged LUTs still break, and make a fading effect but they are not needed - I can do simpler LUTs and not have issues.

The results are amazing - I can do a non flashy update which is not causing burn in and full updates that work. I have applied the Waveshare v2 panel LUT for full (fast, flashy) update as well. It does full "flashy" updates a lot over night to try and clear any unwanted charge, just in case.

So finally I have cracked my months long e-paper headache.

If you got one of my older controllers you may not even see a problem - it only happens with some graphics, but if you have an issue the fix is a simple component change - ask me if you need a new 470uH indicator sending.

2025-02-18

E-paper

E-paper is pretty magic stuff, and somewhat voodoo in the way the drivers work.

Some time ago I made my own drivers for various e-paper devices including the Waveshare 7.5" 480x800 mono display.

The only complicated bit was working out a fast LUT to allow things like the clock update without several seconds flashing the whole display black and white. If you have used e-paper, you will know that a normal update is a muti second sequence of black and white flashing, even if only for a region of the display.

This is problematic in many ways, leaving some level of shadow of the changes, and possibly causing charge to build up and create ghosting. I ensured we do some full updates (only once a day), but that seemed to be fine. I have used this on signs for some years now, and they work well.

Seven segment digits

The use of seven segment digit fonts for the clock, i.e. what changes every minute, is important too. Any shadowing looks clean because it shows on the segments that are logically on or off only, indeed a shadow of off segments looks perfectly normal, even deliberate.

Applying the fast update a couple of times also works well to kill off the initial shadow of the change.

So yes, this works well.

Problems?

However, having used this for some years, I ran in to a snag.

The problem is down to the choice of black and white on the image as a whole. I did check, and adding some heavy capacitors on the power lines did not help, so not that. A choice of image with a lot of white (even as shown here) was enough to create some extra ghosting on change and look messy.

So I tinkered some more. I got a very clean effect initially but greying and fading within seconds, arrrg! I then decided to leave the power on, PON, and that works to hold the black and white cleanly. Yay.

But no!

This was creating a nasty cumulative effect, over several hours the display did a nasty burn in. It is not a real burn in, but charge on particles in the display. It meant that the display got more and more ghosting of previous segments and text. After a day it was really terrible.

So back to the auto PON/update/POFF, which is what I did before, but that again left it grey.

Finally after yet more tweaking, I have a settled on PON, update, POFF manually, i.e. not using auto mode, and setting a 4 frame setting on POF (not 100% sure what that does). The result was that the final fading was very slight, leaving a pretty clean display even when there is the problem image.

Clearing the burn in

I then had to do a lot of black/white full refreshes to try and clear some of the burn in and it is working, but taking time. I have added an option for over a hundred full updates in middle of night, now.

So I think I have it sussed, again.

What's next?

My E-paper code allows clock, date, sunrise/set, QR codes, (seasonal) images, and a few other bits, even (at a push) bins that are to be put out (Monmouthshire). The effects are configurable and stack up from the bottom of the display (well, bins at top).

But I think I will start a new version.

The plan is a series of widgets that you can set anywhere on the display and any size in any order. This will allow me to add more and more widgets - maybe weather as well, simple text, images of other sizes. All sorts, and easily extended over time.

Buy these?

Finally the plug, I have sourced 100 of these very nice 7.5" displays, and selling on Tindie with and without my controllers.

Regardless of my work on this code, you can always load esphome, or other code to run these displays.

2023-11-28

No No-bell prize

I wanted to improve our doorbell... Yes, that is dull.

But the main change is not the bell (a nice, old style bell in the kitchen, which is driven by a Shelly, and the sitting room, and flashing lights in bedrooms and hot tub), or the bell push itself as such, but a sign on the door by the bell.

We used to have a simple brass "please ring the bell" sign, pointing to the bell push. Still, too many people knock instead.

Push the button

So the idea is a sign, and additional bell push right by it, on the actual door. The sign has the house name and number and road name - that itself may help as we get parcels for the same number in the next road often, and they get ours. But a sign saying ring the bell with a hand pointing to the bell push right by the sign.

The magic happens when they push the bell (either the new or old bell push) - the sign lights LEDs on the back and changes. The basic option is like this...

I included a barcode with date time and postcode for photos when leaving a parcel.

Seasons greetings

I also decided it may be a fun idea to change the message, add Christmas tree for now, and so on, but even regionalise the message...


The idle message can be updated and made seasonal, I may even automate based on date, but also the message shown when you press the button can vary depending on circumstances. This saves me putting a sign on the door when we are out - which is a notice to everyone that we are, well, out. The message for when we are out ("leave parcels behind the double gates") is only shown when someone pushes the bell. Indeed other messages can be set if needed.

Let there be light

The main way it decides what to show is based on lights. Yes, that seems crazy, but is incredibly simple when almost all lights are Shelly running tasmota and reporting to MQTT. I can track light states. I have a stairs light which only gets turned off when the alarm is set (we are out). I also track the hall light, which is an easy way I can indicate "we are busy, leave by the door" for when I am in the hot tub, etc. Indeed, if I change a light when the message shown updates in real time, so if in the hot tub I can remote turn off the hall light from my phone when the bell rings.

I also have Mastodon DMs for the bell, with exact time stamps to make easy to find in CCTV.

It also means control of the status display is something my wife can also easily understand and change if she wants, just using light switches.

Making a board

Obviously I designed my own circuit board for this. It works with a waveshare 7.5" e-paper display.


It sticks to the back of the board, has an ESP32-S3 with wifi, USB connectors, and big solder tabs for wires for power and the bell itself. It was designed so it could be set in resin even (though that seems to break the e-paper, possibly by getting in the FPC connector). So a bare board with acrylic spray for now.

No-bell prize

It did not work. The screen did not update properly. I was disappointed to say the least.

Old
New

The fix was to change the inductor and make it work, yay, no no-bell prize for me now.

So, finally, it works!

Update: The only reason this board is this size is because it has LEDs (one in each corner) do fits the 7.5" e-paper. If not then it could use a much smaller board, which I have also designed. But the new version of this larger board now has 24 LEDs, given that the LEDs are the only reason for the larger board this makes sense, but it may be a slight power issue as they are 10mA when white, so some testing may be necessary.

Update: I love the fact I have been accused of "nerd sniping" Bloor. He got one of these 7.5" panels with the waveshare HAT, and somehow he totally messed up the simple task of the FPC connectors, so much he broke several of them, and then managed to crack the display trying to get one working, and threw it all away. I come in and not only have no problem with the connectors, but then I don't just use the 7.5" panel and HAT with no problem, but make my own better PCB, and a new smaller PCB, and a version 2 of both boards, and a working door sign, and now even listing on Amazon! Is that "nerd sniping", or am I bad?

2023-05-30

SQFMI Watchy (first impressions)

I decided to get a Watchy to play with - mainly as a learning exercise, and I think for that it will be perfect. It was not that expensive (£48.80+VAT from Mouser, and free delivery). It comes as a kit which is very easy to assemble (probably because of the hassle of EMC, CE, UKCA, etc) but it is sold as a development device so not unreasonable, IMHO.

Hardware

The hardware is an ESP32, plastic case, rubber strap, battery, accelerometer, vibrator, real time clock chip, 4 buttons, a 200x200 e-paper display, USB connector, and battery charging circuit.

This is quite a nice set of hardware. My main concern is the e-paper display is not, in any way, protected, other than the recess in the case. I understand a screen protector may be available. As a watch it is slightly chunky, probably more than necessary. But it is nice. They have a milled aluminium case option as well.

Out of the box

Obviously it is a kit and needs assembly, which is very easy, but then it does work. However, I would have expected it to be a bit more slick to be honest. This has been around a few years now. Small details like...

  • Button pushes are not handled well, e.g. you can select an item in the menu and immediately have clicked the menu for the item - an example is Set Clock, which you have to press to select very briefly or you have skipped the "hour" and moved on to "minutes". Button response and handling could be a lot better. (Obviously the clock is ideally set by NTP over WIFi).
  • It lacks simple setting like time zone, even without DST, this seems like a setting a watch should have. It can be set, but by editing an include file in the code and re-flashing. The nicer default code also grabs weather but has a default city code set of New York, and you have to edit the include file to change that. A UI for that may be harder, but remember it has the option of serving a web page for more complex settings, so could handle this.
  • The 7 segment font is nice at full size but looks badly scaled down on smaller digits, which is a shame.
  • You expect to be able to upgrade the firmware, and there is an option. But the option says to go to a web site from bluetooth enabled phone, and click next. But the web site is the main page for Watchy and that has no hint of any tool for loading new code by any means. Why not have a simple WiFI OTA upgrade option?

P.S. I did not even consider, but for some, choice of 12 or 24 hour clock needs to be an option.

Trying some other code (examples)

Mouser say it works with Arduino, MicroPython, and ESP-IDF. The main reason to getting it was it works with ESP-IDF as that is what I use.

However, it seems it works with Arduino and PlatformIO. I see nothing on the web site about an ESP-IDF build environment.

I went for the simple option of loading Arduino. I don't like it, but it works, and the instructions were simple enough and only a few steps. It worked seamlessly to load new code, and that is where I found the include file for location and time zone and city.

There are a load of "example" watch faces, but they are all pretty crap. They are a fixed background and time in a different font. I mean there is one that looks like a DOS screen with time on the files listed. It is not good as a watch face really, but I see what they are getting at. But the others are all a similar theme, they just have time and maybe date in different font on a static image.

I would have hoped for something more interesting. Faces with sunrise/set, or moon phase, or an analogue face. But all the examples are boring. Now, I may well be missing a treasure trove of code somewhere on The Internet, but a poor impression to start with.

It would have made sense for the "standard" build to have a choice of "faces" as an option, all in the same code, even.

Learning exercise

As I say, the main reason is a learning exercise, so I hope to make my own code for this from scratch. This means e-paper drivers (I have done some before, so not hard), and accelerometer, and RTC, all of which should be simple. I can then make a nicer watch app for a start, I am sure. But not sure I would use as a watch. I know I have done a good job if one of the grand kids wants it when I am done. I was pondering showing solar production stats on it even.

But longer term there are a load of things I can learn using this as a test platform.

  • Ways to manage battery power, e.g. deep sleep until end of minute when updating time, and maybe the low power sub processor to check for button presses in between. That is all useful stuff to learn as they are features of the ESP32 and important for a lot of applications, not just a Watch.
  • Battery charging - I have not done battery based boards, but this has a battery and does charging. This is a good starting point to get my designs handling batteries sensibly.
  • Directly connected e-paper. I have played with e-paper but always as a "module", a display and board and some chips and a row of 0.1" connectors. This is directly e-paper to a connector on the board. This would be good to do on any design I have using e-paper. It makes it cheaper and smaller than using a module. So this gives me a way to do it (PCB wise) and a test platform.
  • Direct antenna. This uses the ESP32 chip directly with printed antenna. I have not dared do that myself. But if someone has done the work, I can copy what they did. It makes for less space and cheaper part and production than using the ESP32 modules. Definitely worth a try.
  • The accelerometer is not something I have touched before, so would be fun, but outside a watch I do not expect a use for it yet. The same is true of the RTC chip - they are generally quite simple.

Will I find the time?

This is perhaps more of a challenge. If I can get it off the ground with my own code, even just working the display, then I think I'll make a complete ESP-IDF based Watchy platform myself. I'll see how it goes.

Battery

And an update - I loaded the latest code and fully charged, and that was a week ago. It is still going. I am impressed, especially as it has been using WiFi to check weather to display and get NTP, regularly.

I am tempted to leave it until it stops. Being e-paper it should leave a time of death on its display in much the same way as an old mechanical watch in a murder mystery would do so, allowing a detective to prove the accurate time of death just after the medical examiner has got it wildly wrong.

Update: It lasted just under 3 weeks (20.5 days ish).

QR abuse...

I'm known for QR code stuff, and my library, but I have done some abuse of them for fun - I did round pixels  rather than rectangular, f...