Showing posts with label AIR-CON. Show all posts

2022-05-24

New air-con, part 5

After the fiasco of the previous air-con install, I was pleased with the new one, as you can see, and especially that I can make my WiFi controllers.

However, this month, as we have got warmer, I have run in to an issue. It was gradual, kicking in some afternoons. Initially it was something that fooled my temperature control, causing it to flip to heating and back to cooling...

I made the controller a bit more reactive, and fixed the flipping to heating, which was good, but still, in the afternoons, things were not right.

Will all this, over night was OK, mostly, but not always. After a while I realised the clue was in the power traces. Basically, after a while the unit switches in to a mode where it cycles, around 11 minutes on, and 11 minutes off, and a low fan when off too.

This is not enough to keep my office cool, and as we go on, it is getting worse and worse. It always starts the day OK for some minutes, but can go in to this mode right away after that.

This is crazy. I tried all sorts. I thought maybe it is the "econo" mode, which apparent limits cooling when below a certain temperature. I even fudged the temperature (replacing thermistor with a resistor) to test this, but no joy.

After a lot of testing for a couple of weeks, I have found it. It is an "anti freeze" mode. This is what they say (when you know what to google). Needless to say that Daikin support did not work this out for us.

What is especially annoying is that when it is pending 10 minutes with "thermostat off", it also puts the fan in what is shows as "LL" mode, i.e. slower than "L". Well, if it want to avoid the coil freezing you would think it should keep the fan at "H", but that is not what happens.

So now we know what it is, well what can I do?

For a start, I can try and pre-empt the anti-freeze logic, but that does not really solve the problem of why it is freezing the first place. It would have helped a lot if Daikin could have simply said "that looks like anti-freeze kicking in" when asked. Indeed, a fault/indicator on the controller or controller app would have helped so we knew the problem.

Even so, a way better outcome than previous air-con install, and some hope it will be "just working" soon.

Update: Clearly air-flow is the issue, but by preempting the anti-freeze I can keep it on full fan more and so have a slightly improved performance for now.

Part 6

2022-04-08

New air-con, part 4

As you know, I got air-con last year, and it had to be taken out. That was a Mitsubishi system. It did not manage to heat or cool even the smallest room sensibly, and had a show stoppers in terms of temperature control of the rooms. So yes, removed. We did keep the lossnay for fresh air though.

I have now got 4 Seasons Solutions to put in new air-con. It works. A lot of this blog is comparing the Mitsubishi with my new Daikin system.

Outside unit

The Mitsubishi system was set up with two outside units on the back wall. Each drove an inside unit. The Daikin is done with one outside unit. It is ironic that the old system seemed to really lack power to actually heat or cool even with more units of a similar size.

A single unit is better, not just for appearance but if there are any issues with planning permission. A heating only single outside unit is actually a permitted development. Yes this unit cools, but you then get in to interesting debates about what happens if you change a heating only (permitted development) to a heating and cooling (non permitted development) and how such a change "does not change the external appliance of the property" so is outside the scope of planning permission. One hopes we don't get in to that debate. In our case I have pictures of the place from just before we moved in with two large outside air-con units that had been there for years, so at best this is about the fact that the air-con location is slightly different. I doubt there will be issues, and retrospective planning permission is not usually an issue. If it was two units, it would be a different matter. It was quite handy as the second power cable and RCBO can be used for the solar install now.

Inside units

The Mitsubishi system had two inside units, each covering two rooms. I should have decided against this, in hindsight. The plan was that we would have motorised vents to allow each to work one room, the other room, or both. That actually worked. We also had relays to switch the controller from one room to the other (it oddly only handles one controller!). That too worked. What did not work is using the controller for temperature, so we could never control temperature in the second room on each unit (assuming the air-con worked properly in the first place, which it did not). So that was a show stopper.

The new system has 4 separate inside units. Even so, it is cheaper. It is cheaper than the rest of the original bill after paying for the lossnay to stay, even.

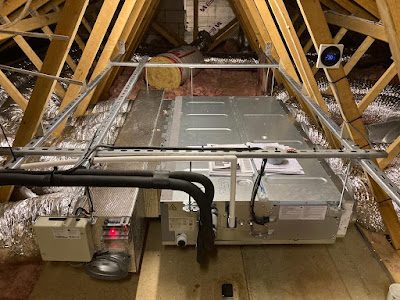
Like the Mitsubishi, these inside units are ducted. This is nice as it means no big wall mount unit - which frankly would have been difficult to find space to mount in some rooms.

However, one of the rooms has no loft. With the Mitsubishi system, we managed to run the air flow duct behind plaster board (there was a surprising gap) and behind wardrobes in a room above. It was a lot of work (which we did, not the installers). We decided that trying to run two more ducts, at 4 times the size each, would really not be practical. So we went with one of the 4 rooms having a wall mount unit. The pipework for this was somewhat easier.

We kept the original duct for the lossnay, so we still have fresh air.

Ducts

The ducts were different. The new system had ducts that are 4 times the size of the Mitsubishi system. This is where we changed one to the new ducts.

The vent/covers are nicer too.

What is more fun is the original Mitsubishi installation had ducts that were half the size of this, i.e. 1/8th of the size we now have, and they were adamant they should have been enough!

Wired controls

The Mitsubishi system had a separate control for the lossnay and air-con, which was annoying in itself for an integrated system. It allowed one air-con control for each inside unit. It could not use the controller as temperature reference - crazy.

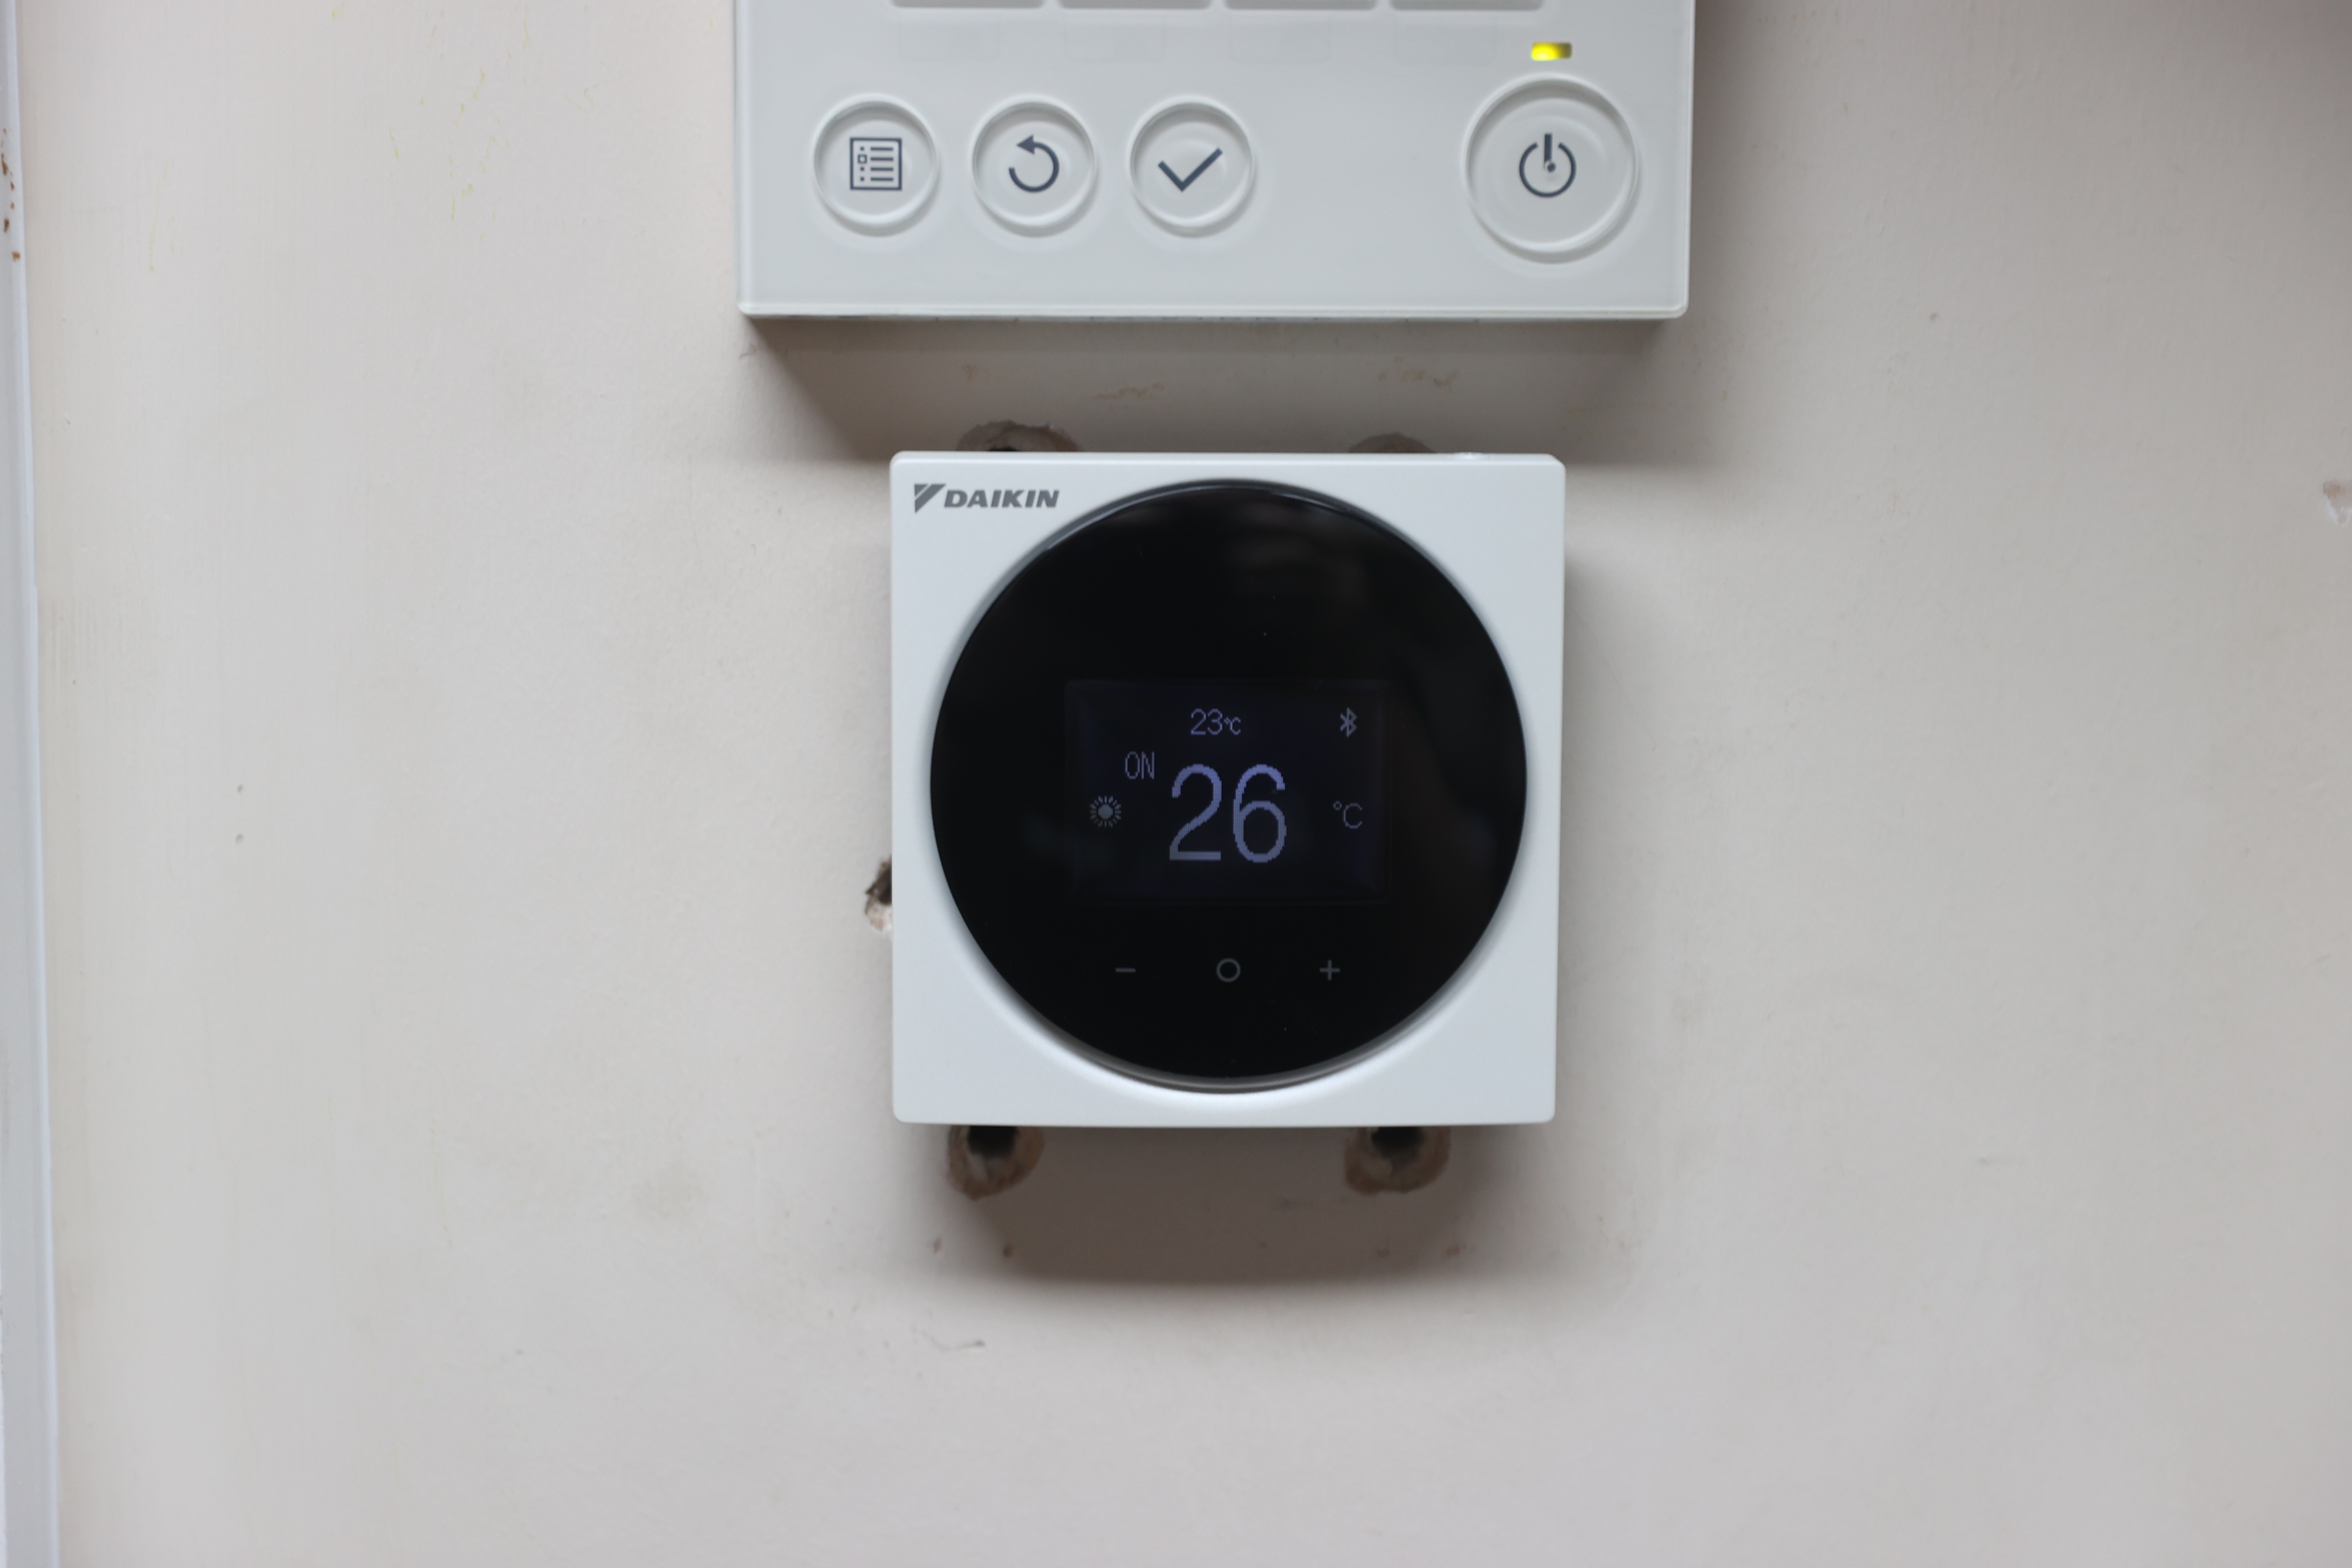
The new system has wired wall mount remotes. They are not bad. (yes, some holes to fill).

The system can use the controller for temperature - yay, and all 4 rooms have separate control (the wall mount uses an IR control though). The system, as a whole, is only heat or cool at once, but each room is separately controlled at separate temperatures at the same time. As we have central heating (also controlled by Shelly modules) if we ever need mixed heat and cool we can do that easily enough.

The new controllers also have bluetooth and an app. This means the controller itself is pretty simple, and all the admin or installer menu stuff is on the app. Not a bad compromise.

Computer integration

This is where the Mitsubishi was really limited. There was no WiFi or bluetooth. The unit did have some connections that allowed for external control, so as fan speed, but not something simple like heat/cool mode. I was expecting to connect to this, and maybe even reverse engineer the wired remote. I stopped doing that when it seemed clear that the whole thing was not going to work well.

The Daikin system, however, has bluetooth on the wired controllers, and wifi modules. OK, yes, I have reverse engineered and replaced the WiF modules, but even so, that was not too hard. What they provided did actually work (if you are happy with a cloud based system).

The fact I now have fine control using my own WiFi modules is a real win. At present it is heating my room over night (see image on right).

Some limitations of ducted systems

Having now tried two ducted systems, they are a little different than the wall mount I have been used to, and some things still hold true for that.

Both systems had few fan settings. The Mitsubishi had 4 levels, but only the top two actually ran the compressor, the first two just blow air, so very limited. The Daikin has 3 levels. The wall mount Daikin has 5 levels and "auto" and a "night" mode. I'd love a "night" mode on the ducted systems to be honest, but looking in to noise attenuators possible, or just getting used to it.

Another caveat is that a ducted system, having vents in the ceiling, it can take a while to heat as the heat fills from the top of the room - this creates a noticeable lag in heating at bed level. The wall mounted unit is much better at this as it able to direct the airflow down and create more circulation.

The proof of the system

The real proof will be in the summer, and we will see. Tests so far suggests it just works, and works really well.

Ooops

Almost forgot, as people will ask: It cost around £10k and took a week to install.

Part 5

2022-04-07

New air-con, part 3

Before I give the run down on the new air-con, I want lots of nice graphs showing how the temperature works, and these take time. The simple summary is that I am impressed. So more in part 4, and lots of photos.

But in the mean time - my little WiFi modules for the Daikin air-con. They work really well, and I have the temperatures coming in now. I am sure there will be some fine tuning.

I also have a web interface, to allow simple local control. I have worked hard on the niceties like easy setting WiFi client mode and so on - this being an areas where the Daikin modules really sucked. These are really annoying fiddly things with web sockets and wifi client connects and DHCP and all sorts - really silly small things that take all day. So slow progress for a change. But this should be really good.

So at this point the idea is that these WiFi modules allow local (web) control, and MQTT control which can be local or external and even secure mqtts if needed - ideal for building management, and no "cloud" shit via a third party. That is working well. A nice touch would be to support the old Daikin http URLs as well, which I may yet do.

But there is more...

One of the things I did in my old house was rather convoluted. It was an MQTT connected app on my linux box that poked the http URLs on the old Daikin WiFi module to provide some MQTT access and control. That combined with a separate tool on my linux box that talked MQTT to that app and the environmental sensors. The result was a really neat and tight temperature control using the environmental sensor as the reference. But it did mean tuning these background tasks on my main linux box.

However, I am taking a new approach now - the WiFI modules talk MQTT directly. And the environmental monitors have evolved to have a time profile temperature for controlling central heating as well. That works well with a Shelly Plus 1 (well several) doing heating and water and so on. So the new approach is that the environmental monitors report over MQTT directly to the WiFi control modules - saying what temp they see now and what target they want (or min+max if needed).

(I had a slight issue that heating is set off in bedrooms during day, as you expect, but with a min of say 18C, which is fine for the central heating, but the air-con meant it though that if that was turned on it had to cool to 18C. I have since made it have a wide range define for idle times to avoid the air-con being silly).

The WiFi module then has an local auto mode override. Much like the wired remote which tells the a/c to be cool or heat with appropriate targets, rather than trusting its auto mode, my module can do the same.

But, as always, I reinvent even my own wheels. The direct access to the a/c makes it much more responsive, so I can create a much nicer algorithm. It is always fun making any control/feedback loop system, and more so when you are second guessing the system you are talking to. Some experimentation, and a lot of settings to allow fine tuning, and I found I have to tell the a/c to heat or cool 1.5C beyond where it things it is before it will turn on or off the compressor as required. So I can compensate for its hysteresis and apply my own rules.

Obviously for efficiency you want to avoid rapid heat/cool switch overs, so I have temperature and time controls for that. But I can tweak the target temperature in real time to make it do what I want.

This is a good example, it is my office during the day today. And we have a fun case where this time of year the temperature now is close to what we want, in this case 21C. So no aircon may be better. However it is a good test of the algorithm to test in this edge case of spring/autumn - when it is really hot outside or really cold outside is an easy case.

What is interesting is that it actually went wrong. At 13:40 ish it switched to heating (the heavier line), and it should not have. I have since found the edge case, the temp only just touched the target on previous cycle, not passing it (difference of > and >=) which meant it thought it had been under temp for over 15 minutes which is enough to trip to heating. I also have a min time it stays heating or cooling, but had been cooling all day (starting 7am). I have since fixed this, so today it would have stayed cooling.

Even so, it is otherwise keeping within around 0.2C or 0.3C of target temperature. Basically it should have wandered off below the line for a while, i.e. the room naturally cooler than 21C, before it switched to heating. We'll see that in the autumn now, or who knows? Maybe next week. This is Wales.

Just to be clear - we are not turning it off and on, or changing between heat and cool all the time, this is just small adjustments to the target temperature and letting the Daikin a/c decide what to do as a result.

What is also interesting is the power usage. When installed on 1st, I was using the controller remotes, not my own code, setting a temp in auto mode. Even the early WiFi module code on 2nd and 3rd was not doing this smart control. The result was a lot more power usage.

As I refined the code over the last few days, making a big difference when I started on the 4th, it has ended up much more efficient. Today, for example...

We get solar in next week, which will provide enough power to more than cover this, thankfully.

But the result of all this is my environmental monitor and air-con Daikin WiFi control modules allow much nicer control. I think we may have to start selling them :-)

Part 4

2022-01-12

Air-con, second attempt

Sadly it has become clear that the system installed is simply not going to work. So we are having it taken out, but keeping the Lossnay for fresh air.

Why on earth Mitsubishi would have a system supplied with dedicated controllers that have a thermistor in them, and a setting to use the controller temperature, but not actually support that, is beyond me. It does not even give an error, it shows a plausible, but wrong, temperature. But apparently they cannot support controlling from the controller, and so the two rooms off each system approach is just not going to work.

So now I have to start again with another air-con company. Maybe we'll get something before the summer.

All good fun. But they have sent interesting pictures of previous installations, which look cool.

So I'll post more when I have it...

2019-09-12

Environmental sensor

For my latest little R&D project I have made a new environmental sensor. These should help us see how good the air quality is in the office, and as usual, I have published this as an open source project for anyone else to make the same.

This proved to be a bit of a challenge, as always. I have already managed to get my head around the ESP32 and the Espressif ESP-IDF now, and have a set of  MQTT based tools as a base (here).

Hardware

I used an ESP32-WROOM-32 again, as they are really nice. I also used an SCD30 CO₂ sensor, which is the most expensive bit at around £40 from RS. I got a nice 128x128 OLED display from Amazon, and a DS18B20 temperature sensor.

One challenge was space - I decided to make the the PCB the same size as the OLED PCB and sandwich the CO₂ sensor in between. This was definitely a challenge to get connectors to fit!

I also decided to try the Molex SPOX connectors as they seem relatively cheap and easy to use.

The other aspect which is especially challenging is power. Most of the bits I have done to date have been alarm and access control and so use 12V on screw terminals. As it happens the unit (pictured above) takes 12V which is in the wall for the door control. But for use in bedrooms I need power to these and so I went for a micro USB. This is simply because that is a really easy and readily available and cheap way to provide a device with power.

The challenge itself is that the connectors have tiny tiny 0.635mm spaced contacts, and are also mechanically crap and come off the board. I ended up getting some connectors that I could superglue to the PCB, and thankfully the power contract are the end, so even though milling and soldering at 0.635mm pitch is just about possible (surprisingly) I can avoid this by actually only soldering the end pins for power. I decided to make the 3D printed case design fit tightly around the connector as well for extra mechanical support, except that means removing from the case pulls the connector off the PCB!

In short, some interesting new hardware challenges.

Software

There are a lot of libraries around for ESP32 and ESP-IDF already, which is nice - but perhaps not as many as for the ESP8266/Arduino based environment.

That said, these are simple enough devices, so actually I ended up doing the I₂C interface for the CO₂ monitor myself using the ESP-IDF directly.

I used a library for the DS18B20 though, and it seems they have been quite clever using the IR remote control hardware to make the one wire bus work using DMA. Impressive. I decided to use a DS18B20 as (a) it allows the thermometer to be positioned where you want, (b) it is away from the components that could get slightly warm, and (c) it seems way more accurate than the one built in to the SCD30 CO₂ sensor. However, the code is happy to use the SCD30 if you don't want to use a DS18B20. Similarly, the code is happy to work without a display, but I am quite pleased with the display, to be honest.

For the display, there is a good Adafruit GFX library, but I ended up doing it myself. The commands for the SSD1327 OLED controller are simple enough, and only a few lines of code to send a whole frame buffer over I₂C. As such, I decided to make some 16 grey level renders of my existing font designs. There is also a logo (configurable).

I found the CO₂ reading was liable to change quite quickly. This is great, except just standing looking at it caused it to change a lot due to your breath. So I ended up damping the reading (biased average with last reading) to remove spikes.

I also decided to round the values for reporting on MQTT so that it is not flooding with updates every second. Configurable rounding, preset to CO₂ at multiples of 10ppm, RH at whole percent, and Temp at 0.1℃. I also added some hysteresis to the reporting.

Obviously I have my air-con control code working with it - just had to tell it a different topic to watch for on MQTT, but I added logging of CO₂ and R/H as well just for fun.

And finally I added settings so it can send MQTT to turn a fan on or off based on CO₂ levels.

It is interesting to see how CO₂ changes during the day.

Overall I am very pleased with it. It is all on GitHub (here) with PCB milling, 3D printed case design, and code. Have fun.

P.S. The OLED displays are made of glass, and very very very easy to accidentally break. Especially if the 3D case design is a fraction out!


P.P.S. I have one by my bed, and it is quite bright, so I now have an MQTT contrast command tied in to the sleep tracking stuff so when I get in to bed it goes dim :-)


2019-04-08

This is cool

Finally (I think) I have my daikinac app working as I want it. It is on GitHub (here). Apart from simple control via MQTT, it proves me with much better temperature control. It has taken days to do this, coding and testing over night typically. One day was wasted as the temperature sensor had fallen on the floor and my algorithm was trying very hard to change the temperature of the carpet under my bed (arrrg!).

Why do this?

  • Fun, and interest, as always
  • Comfort - air-con controls are annoying, they allow temperature to be out by well over 1℃ and I notice that.
  • They are also crap at an "auto" mode and don't change from heat to cool sensibly (e.g. can be 2 or 3℃ out before they do it), hence I have to change manually in spring/autumn during the day.
  • Saving money by better controlling when they are on and off as part of home automation.

The result:

±0.2℃ of target. (Red line is measured temperature) Mostly ±0.1℃. Measured using a device with only 0.1℃ precision.


How it is done...

Basic logic is checking the settings and info from the air-con every minute using http, and collecting temperature from a separate thermometer via SNMP. This is place by the bed (i.e. where I want the temperature set).


The basic algorithm involves having an offset from the target temperature, and sending that to the air-con as its target.

Initially, and after any change of mode or fan rate control or my target temperature I allow 15 minutes for that to settle and then start collecting measured temperature. Once I have 10 minutes of data I consider changes to the offset. I collect up to an hour to track a moving average.

If the data shows a minimum above the target or a maximum below it, i.e. "way out" I make a step change in the offset to bring that in line, and flush the data and wait 15 minutes to settle again.

If the min/max cover the target, then I adjust the offset by a small amount (0.01℃) based on the average being higher/lower than target.

This all keeps the temperature averaged at the target and allows for any temperature difference from air-con unit to where I am measuring. Normally this is very low (with windows closed), e.g. well under 1℃. However, with a window ajar to allow fresh air this an be several degrees (I now have a nice heat exchange fan in the room instead, so windows closed).

Hysteresis

Unfortunately the air-con is not quite as good as I would like. It does lower power as it gets closer to the target, which is good, but ultimately when the temperature drops passed the target it will engage the fan and compressor and push the temperature 2℃ beyond the target and then allow it to settle. This cycle can mean a compressor on for maybe 5 to 10 minutes and repeat every hour.


What I have done now is recognise when it is doing this and kill the compressor. Once the compressor is on and the temperature crosses back past the target I turn it off by setting a target 3℃ before the target. This means we "overshoot" by only 0.1℃ to 0.2℃ if at all.

The result is the compressor on for up to a minute maybe every few minutes (depending on how har it is having to work to maintain temperature). I don't know if this change in duty cycle is detrimental or not. It probably means less usage overall as we are not overshooting the target temperature by 2℃.

Noise

One concern was noise, but even in night mode I can hear a ticking clock over the fan - the compressor and fan going on/off happens anyway, just more often now. Works well.

Other bits

If the offset to be applied is getting too high and not working, we switch from quiet mode to normal auto fan mode as clearly it needs more oomph.

If the offset to be applied is getting too low and not working, we switch between heating and cooling.

Comfort

The thermometer may well have a level of error, obviously, but I am not trying to do a physics experiment here. I don't really care as long as it is consistent and precise as ultimately the target temperature depends on comfort. It can be impacted by lots of things like being unwell, or just coming in from hot or cold outside. However, I now have a reliable way to set a temperature and then make any relative adjustment for comfort.

Dodecahedron

I was shown a dodecahedron with LEDs inside. Looked great, so decided to have a go. The principle is not that hard - a PCB strip on the insi...