Showing posts with label WS2812B. Show all posts

2023-10-14

Playing with a serious number of WS2812B RGB LEDs

I have done some fun stuff with LEDs, but now I have found some very small 1mmx1mm WS2812B LEDs, I decided to make a Stargate.

Well, the doctor said to rest, so this is my resting! I have spent a week on this - much of that waiting for slightly wrong 3D prints to print. 3D printing is always a massive time hog.

My first ideas was 210 LED, but then I went for a better design with 372 LEDs.

I have since revised the design to 507 LEDs!

The image shown here is the 372 LED design.

Needless to say, some C code was used to place the LEDs and caps and vias and tracks for this.

To my surprise the power usage is not that bad, all 372 LEDs on full white is 3.6A, including the ESP32. So can run off a suitable USB charger.

In practice, the Stargate dialling sequence does not go over 0.8A, so no problem.

As usual, all open source on my GitHub.

However, I did find that JLCPCB cannot cope with more than 400 designators on one line in a BOM file :-)

As for spinning, I could make a spinning effect using 117 LED rings, but I could not spin the actual glyphs - so as a compromise I illuminate the glyphs that are dialled in situ. I think it works quite well.

Of course, the challenge then was a 3D case for it. This was tricky - there are a lot of 3D models of stargates, some more easily printed than others, but I wanted one I could nicely slice in two and allow the PCB to be inserted. That proved more complex, so I designed one from scratch in OpenSCAD. It is simplified to be easy to 3D print, even though the whole thing is nearly 7 hours print time.

I also needed a reasonably neutral colour to allow the LEDs to show. I ended up using the ColorFabb Glowfill, which has the side effect that it glows in the dark.

Here is it dialling...

This is the latest 507 LED PCB design, the main change is an extra kawoosh ring that will be inside the 100mm gate ring. The idea is that this could then work with a mirror and half mirror perhaps to make a gate tunnel effect. I'll see when I make some more. It works out around £30 per board, shipped.

The extra tabs are not a space gate effect, honest, they are tooling holes and fiducials for production, and get snapped off.


That's a lot of LEDs

2023-09-27

Dialling the gate

People will know I am a slight Stargate fan (!), and I like making PCBs. So, well... Latest is...

LEDs

First off, the LEDs. There is a very popular LED format, a WS2812B chip and RGB LEDs in a package. These use a serial daisy chained control channel allowing 256 colours of each of Red, Green, and Blue, to be loaded individually to a whole chain of LEDs. This design has 372 LEDs.

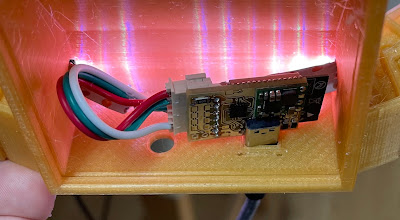
There are standard libraries to drive these, but I have discovered the ESP32 S3 is better as it uses DMA for the "remote control" hardware that is used to drive the data for these LEDs.

You can get these on tapes, and rings, and so on, usually 5mm x 5mm, or 4mm by 4mm, and I had even seen some 2mm x 2mm, but was surprised to find they are now available in these tiny 1mm x 1mm format. This ring design has a 100mm diameter centre hole.

They also usually need 5V power, but amazingly these small 1mm x 1mm modules work on 3.3V (or 5V), which is impressive (Blue is usually the voltage hog).

They are also very cheap. Part XL-1010RGBC-WS2812B, LCSC Part C5349953.

Alignment

My first mistake with the LEDs was making the layout simple, so a grid of these LEDs were one way up on one row, and the other way up on the next row. This allowed GND to be between two rows, then VCC between two rows, and so on. I put caps at the ends of the rows (which works well). This allowed me to pack them at 1.6mm spacing.

This was impressive, but I missed the (apparently well know) issue that the LEDs are placed within the 1mm x 1mm space, so for example Red is one side, and hence an all grid red looks like this, not evenly spaced.

They have to all be the same way around to avoid such issues.

Diamonds

I tried doing the same way and really a pain to track. The trick is to actually place them at 45 degrees, diamond style. This makes tracking really simple.

This allows a track at the top for GND, and at the bottom for VCC, and a link from LED to LED corner to corner for the daisy chained data line. Shown here I have vias for extra power. With thin tracks between the pads of the capacitors (expected to be one per LED) it makes for a really neat layout.

Grids

Grids were easy, and grids of LEDs like this are simple, with 2mm spacing (no caps), which is not bad. Caps added at end of row or column.

Apart from tracks joining VCC and GND top and bottom, or side and side, I actually created zone fills to make for thicker overall power tracks.

The latest design at 2mm spacing is 10mm x 18mm for a 5x7 grid, and allows them to be placed next to each other for a whole row at 2mm spacing, LEDs at the top and bottom of each column.

Rings

The other thing to do was rings of LEDs.

The principle is pretty simple, tracks (this time arcs) for GND, data, and VCC. Some zone fill for VCC and GND, again arcs (well polygons and lots of points).

Adding vias is fun, and I ended up with code that puts them off to one side if diodes and caps too close together (as above image) or in line in the GND/VCC tracks when enough space.

A simple ring with evenly spaces LEDs and caps is easy, but then I decided I needed some grouping of LEDs together with specific tighter spacing (the chevrons in the top image).

I also had to cater for the fact that power vias from one ring could clash with some of the next ring, and so omit some that were too close.

C code

If you have tried doing this in KiCad, it is far from easy - even with the grid locking and simple spacing like 2mm, it is hard, and making a ring with 39 LEDs, i.e. 4.6153846 degrees between LED and cap and LED, is, well, totally impossible. No chance doing it manually at all.

So, obviously, I ended up making C code, parsing in the PCB file, and moving LEDs and caps and making tracks and vias and fill zones. I have code for grid layout and ring layout now.

The gate

Working out the exact animation for the gate will need a bit of trial and error I expect - I cannot actually spin the symbols, so some poetic licence involved, but easy to "spin" the rings of 117 LEDs.

I have actually gone for a number of rings...

  • 117 inner rings, this is 3 per gate symbol, so makes for a nice "1 in 3" spin effect and allows the inner to be lit up and made sparkly for the gate open.
  • 39 gate symbol ring, so I can light individual symbols during dialling (seeing as they don't spin).
  • 18 ring for bottom of engaged chevrons (9 chevrons, so 2 per chevron).
  • 117 outer ring, again for spinning, but also can be two for chevron when engaged, and 3 for chevron end when not.
  • Two 18 rings for chevrons getting wider.
  • A 45 ring, so 5 per chevron, for the lights at the edge of the gate when selected.

I think making it dial will be cool. PCBs ordered, so a week or so (maybe more, some holiday in China), and I can post video of the real thing.

Open source

This is all open source, PCB designs and code, but if you want to buy one of these, and a driver, let me know. I have 5 on order.

2023-05-10

TX1812Z5 and WS2812B

I have used the classic WS2812B LED strips, they are very common, and AdaFruit do a lot.

They have a serial data line, in and out, on each RGB LED, and GND and 5V, making them ideal to make an LED strip will all programmable LEDs.

They work by sending a serial stream of short+long or long+short bits, 24 bits per LED, so the first LED "eats" the first 24 bits and then passes on the rest. A gap then means all done and they can all load the LED pattern. The data is around 1.25uS per bit, so even with hundreds of LEDs, this is really fast to update.

There are standard drivers, including for ESP IDF on the ESP32s I use.

But, try as I might, I could not find any of these common 5mm x 5mm "neopixel" RGB LED modules on LCSC/JLCPCB for an LED ring project. They had them on LSCS, and in stock, but would not pick up on a BOM on JLCPCB, or even allow a parts buy from LCSC, crazy!

What they did have is a much smaller, 2.1mm x 2.1mm, TX1812Z5 based, modules. And a Chinese data sheet!

So, tentatively, I designed boards using these and ordered. They are smaller, which is nice. The design was fun, C code to make circular tracks...

I was lucky - JLC queried the pin 1, as I did not (originally) have any pin 1 mark on silk screen, and only then did I realise the pin numbering for the 4 pins was different to the common 5x5 LED modules. So I was able to cancel the order at that point. Had that not happened I would have a number of duff boards!

Having got the pin out right, I ordered again. Then I had a slight panic. The LEDs are run on 5V, and hence a USB lead feeding the inner ring as 5V there. For 24 LEDs in the ring a USB-C will be fine. But, I spotted in the Chinese data sheet that min VIH is 0.7VDD which would be 3.5V, and I am driving from 3.3V data line as that works with a normal neopixel module. It was too late to cancel. But to be fair, WS2812B says 0.7VDD as well, and I know that works with 3.3V.

I also spotted that the timing was 295ns and 595ns not the timing for WS2812B which is 400ns+850ns or 800ns+450ns. Thankfully this would be easy enough to fix in software.

To my surprise, it just worked. The only issue was my PCB sandwich design is a bugger to solder the boards together. Timing and voltage do not seem to be an issue!

The project is a PCB sandwich, with top being a coaster for an (empty) fancy bottle on each table at a wedding. It is going to be awesome.

2021-12-13

Dial the gate

One of the things I have not previously tried is LED strips/panels.

These are quite clever as they daisy chain one data line, allowing you to send colour data to every LED in a sequence, and hence make them all have any pattern you like. They are pretty quick too. There are a few chips out there, but Amazon have loads of strips and panels, such as a 1m/144 LED strip for £12 using WS2812B controllers.

Obviously libraries exist to make this easy to control. I use the ESP32 chips with the ESP-IDF development environment. However I am (for reasons too tedious to go in to) using CMake now instead of Make. I really do not know CMake well. So was fooled initially. Trying to include "led_strip.h" did not work.

It turned out that all I had to do was add "led_strip" to the CMakeLists.txt in COMPONENT_REQUIRES. And bingo. I am sure I tried that first, but must have got it wrong, but worked in the end.

It is then easy to use. Simple call to initialise, clear, set pixel colours, and flush out.

So what was the project? Well, I printed one of these from thingiverse. It is designed as a light. I struggled the thread the LED strip into it, and so I recommend printing 10% larger. I then wired directly to a USB powered ESP32 module, so 5V to the LED strip, and the 3.3V data line. To my surprise that works, as I was expecting to need to switch it to 5V data. Also, the LEDs can easily draw too much power causing USB to shut down, but by limiting the brightness (it was way too bright anyway) and using only 72 not 144 LEDs, I have kept it working. I just needed a bit of glue gun then.

This is the result :-)

The sequence is too fast for proper dialling, obviously, and it is spinning a blue LED not actually turning the ring. It lights in the chevron positions, but not the actual chevrons. But the bright light for the kwoosh, and then sparkly/fadey for the open gate, seem to work quite well. All on github.

It talks MQTT so I made it that when the house (electric) gates open, the gate opens in the living room :-)

That said, I also have a Shelly button1 lying around that does it too.

QR abuse...

I'm known for QR code stuff, and my library, but I have done some abuse of them for fun - I did round pixels  rather than rectangular, f...