Showing posts with label DAIKIN. Show all posts

2023-02-15

BLE Temperature sensors

I mentioned the hot tub, and tracking that temperature is working well.

But there are some more options now I have them working so well...

Environmental monitors

My small environmental monitors already work with various temperature sensors including SCD30 (not very good), SCD41 (good, but slow startup adjustment), and DS18B20. Adding an option to read from a BLE sensor was really easy. This has solved a problem where the downstairs (small) toilet radiator was linked to the hall, and reportedly "hotter than the fires of hell" (actually 33℃). It was not convenient to wire up its own sensor before. Now it has one of these BLE sensors on the wall. It works really well.

Radiators

For now, I am using my environmental sensors to control both radiators (winter) and aircon (summer). They way it works radiators is using a Shelly Plus flashed with tasmota and a (wax based) actuator - works well. The environmental sensor turns it on/off for the corresponding radiators (GroupTopic). They then tell a FireBrick to turn a profile on/off, and a linked set of profiles tell a Shelly driving the boiler to turn on if any of the radiators (on a floor) are on. Complicated, but works.

I suspect what I need to make is some ESP32 code for the Shelly that does this directly - the control of the radiator actuator directly from the Shelly, and using the BLE sensor for reference. This could then announce from all radiators that are on, so that some other ESP32 code in a Shelly for the heating can turn on if any radiator in its area is on. All done with no WiFi, in theory. Both bits of code will be a doddle, but actually the harder part is setting the required temperature setting for each radiator, and then the fact that I may want to control the aircon. So actually, for me, these are probably better using my environmental sensors for now (which also have a nice display). I can see how this would work for most people though.

Daikin air-con control

The other thing that could perhaps be made simpler is the Daikin wifi control modules (amazon). At present these provide simple web control and status, or they can work with my environmental sensors to manage them based on a separate temperature from that sensor (or, now, even from a BLE sensor).

What would be cool is a direct mode to work with an external BLE sensor - no need for the environmental monitor doing the control. It could be related to a status display!

This would actually be really cool for most people - whilst I have a complex system of radiators and/or aircon in various rooms, for most people with air-con the control should be simple. And being able to literally stick the temperature reference where you need it - e.g. by a bed - would be ideal. Even better if it works with no need for an MQTT broker (or even wifi, apart from set up).

So what next?

I think both are good ideas, so planning to work on them. For aircon, some simple start and stop times may make sense as well.

The real trick with all of these is setting the target temperature. I currently use a configuration file, JSON, over MQTT, which is fine for me, editing a config file. But not for most people.

I suspect I need to make an interactive graphical temperature target profile graph edit thing in HTML. That will be a pain in the arse! It should be possible though, and then apply to all there different approaches here. I may end up just making a time/temp table, sort of like old school heating controllers. I'll have to see...

Comments welcome... What do people want?

2022-06-02

New air-con, part 6

Well, well, well... I am impressed with 4 Seasons. They have only gone and sorted it.

This is the huge difference between this install and the previous Mitsubishi install from a different company. The customer service to get to the bottom of the problem and fix things.

Firstly, they did discuss this "anti-freeze" mode with Daikin, and whilst we all agreed that turning the fan down was silly, their point, which is very valid, is that it should not be happening at all. The refrigerant should not be getting so cold in the first place - this is a fault condition. That is what needs fixing.

Naturally I leapt to the conclusion that the issue was air-flow. But I was wrong. It seems the advice from Daikin at this point was right - they said to check the refrigerant. Well, pressures had been checked several times. But they suggested there was too little refrigerant. Indeed they suggested (counter intuitively) that we would see these lower temperatures if there was not enough refrigerant. That seems crazy, obviously.

Well, the installer, and I, were rather baffled, but the only thing that basically makes sense is that the system is (over) compensating for the lack of refrigerant, and that is how it ends up colder. And, of course, at the same time, it is unable to carry the heat away properly, so does not work as well.

The symptoms were pretty simple, when cooling, the refrigerant quickly goes down to as low as -10C, which it manages for a few minutes, and then the anti-freeze mode kicks in, and everything stops for 10 minutes, and overall things are not working well.

Now, the refrigerant is settling around 5C with no problem, and cool air is coming out, and the room is quickly cooling. It is not going negative at all, not even getting below 4C. It varies, and I have seen 5C to 8C, but that is "sane".

So what did we fix?

The fix was to completely drain down the system and refill it - simple as that. The big clue was that only 0.9kg of R32 came out. It should have had around 2.5kg. So he emptied, vac'd, and refilled. What I had not appreciated is that these systems come pre-filled for installation, so it seems that somehow it must have come without the right amount - some must have leaked in transit (not good). But the only real test he can do is pressures, and they were fine, so no clue that there was not the required amount of R32.

I'll add some graphs once we have a couple of days running to confirm. But I am sat here on a warm sunny day in a nice cool office. To say that I am over the moon is putting it mildly.

Side effects

A small side effect is that my Daikin wifi modules have way more monitoring and reporting and graphing now. I did loads of work to try and find what was actually happening, turning in to a seriously useful tool.

Next job is the new controller to work with it for when people want manual control but doing a better job than the normal Daikin controller.

Another small side effect is that my previous very tight temp control is now a little less tight as the effect of cooling (or heating) is much more and continues longer, so some level of predictive processing may be needed to manage tighter temp control. Should be pretty easy.

2022-05-24

New air-con, part 5

After the fiasco of the previous air-con install, I was pleased with the new one, as you can see, and especially that I can make my WiFi controllers.

However, this month, as we have got warmer, I have run in to an issue. It was gradual, kicking in some afternoons. Initially it was something that fooled my temperature control, causing it to flip to heating and back to cooling...

I made the controller a bit more reactive, and fixed the flipping to heating, which was good, but still, in the afternoons, things were not right.

Will all this, over night was OK, mostly, but not always. After a while I realised the clue was in the power traces. Basically, after a while the unit switches in to a mode where it cycles, around 11 minutes on, and 11 minutes off, and a low fan when off too.

This is not enough to keep my office cool, and as we go on, it is getting worse and worse. It always starts the day OK for some minutes, but can go in to this mode right away after that.

This is crazy. I tried all sorts. I thought maybe it is the "econo" mode, which apparent limits cooling when below a certain temperature. I even fudged the temperature (replacing thermistor with a resistor) to test this, but no joy.

After a lot of testing for a couple of weeks, I have found it. It is an "anti freeze" mode. This is what they say (when you know what to google). Needless to say that Daikin support did not work this out for us.

What is especially annoying is that when it is pending 10 minutes with "thermostat off", it also puts the fan in what is shows as "LL" mode, i.e. slower than "L". Well, if it want to avoid the coil freezing you would think it should keep the fan at "H", but that is not what happens.

So now we know what it is, well what can I do?

For a start, I can try and pre-empt the anti-freeze logic, but that does not really solve the problem of why it is freezing the first place. It would have helped a lot if Daikin could have simply said "that looks like anti-freeze kicking in" when asked. Indeed, a fault/indicator on the controller or controller app would have helped so we knew the problem.

Even so, a way better outcome than previous air-con install, and some hope it will be "just working" soon.

Update: Clearly air-flow is the issue, but by preempting the anti-freeze I can keep it on full fan more and so have a slightly improved performance for now.

Part 6

2022-04-08

New air-con, part 4

As you know, I got air-con last year, and it had to be taken out. That was a Mitsubishi system. It did not manage to heat or cool even the smallest room sensibly, and had a show stoppers in terms of temperature control of the rooms. So yes, removed. We did keep the lossnay for fresh air though.

I have now got 4 Seasons Solutions to put in new air-con. It works. A lot of this blog is comparing the Mitsubishi with my new Daikin system.

Outside unit

The Mitsubishi system was set up with two outside units on the back wall. Each drove an inside unit. The Daikin is done with one outside unit. It is ironic that the old system seemed to really lack power to actually heat or cool even with more units of a similar size.

A single unit is better, not just for appearance but if there are any issues with planning permission. A heating only single outside unit is actually a permitted development. Yes this unit cools, but you then get in to interesting debates about what happens if you change a heating only (permitted development) to a heating and cooling (non permitted development) and how such a change "does not change the external appliance of the property" so is outside the scope of planning permission. One hopes we don't get in to that debate. In our case I have pictures of the place from just before we moved in with two large outside air-con units that had been there for years, so at best this is about the fact that the air-con location is slightly different. I doubt there will be issues, and retrospective planning permission is not usually an issue. If it was two units, it would be a different matter. It was quite handy as the second power cable and RCBO can be used for the solar install now.

Inside units

The Mitsubishi system had two inside units, each covering two rooms. I should have decided against this, in hindsight. The plan was that we would have motorised vents to allow each to work one room, the other room, or both. That actually worked. We also had relays to switch the controller from one room to the other (it oddly only handles one controller!). That too worked. What did not work is using the controller for temperature, so we could never control temperature in the second room on each unit (assuming the air-con worked properly in the first place, which it did not). So that was a show stopper.

The new system has 4 separate inside units. Even so, it is cheaper. It is cheaper than the rest of the original bill after paying for the lossnay to stay, even.

Like the Mitsubishi, these inside units are ducted. This is nice as it means no big wall mount unit - which frankly would have been difficult to find space to mount in some rooms.

However, one of the rooms has no loft. With the Mitsubishi system, we managed to run the air flow duct behind plaster board (there was a surprising gap) and behind wardrobes in a room above. It was a lot of work (which we did, not the installers). We decided that trying to run two more ducts, at 4 times the size each, would really not be practical. So we went with one of the 4 rooms having a wall mount unit. The pipework for this was somewhat easier.

We kept the original duct for the lossnay, so we still have fresh air.

Ducts

The ducts were different. The new system had ducts that are 4 times the size of the Mitsubishi system. This is where we changed one to the new ducts.

The vent/covers are nicer too.

What is more fun is the original Mitsubishi installation had ducts that were half the size of this, i.e. 1/8th of the size we now have, and they were adamant they should have been enough!

Wired controls

The Mitsubishi system had a separate control for the lossnay and air-con, which was annoying in itself for an integrated system. It allowed one air-con control for each inside unit. It could not use the controller as temperature reference - crazy.

The new system has wired wall mount remotes. They are not bad. (yes, some holes to fill).

The system can use the controller for temperature - yay, and all 4 rooms have separate control (the wall mount uses an IR control though). The system, as a whole, is only heat or cool at once, but each room is separately controlled at separate temperatures at the same time. As we have central heating (also controlled by Shelly modules) if we ever need mixed heat and cool we can do that easily enough.

The new controllers also have bluetooth and an app. This means the controller itself is pretty simple, and all the admin or installer menu stuff is on the app. Not a bad compromise.

Computer integration

This is where the Mitsubishi was really limited. There was no WiFi or bluetooth. The unit did have some connections that allowed for external control, so as fan speed, but not something simple like heat/cool mode. I was expecting to connect to this, and maybe even reverse engineer the wired remote. I stopped doing that when it seemed clear that the whole thing was not going to work well.

The Daikin system, however, has bluetooth on the wired controllers, and wifi modules. OK, yes, I have reverse engineered and replaced the WiF modules, but even so, that was not too hard. What they provided did actually work (if you are happy with a cloud based system).

The fact I now have fine control using my own WiFi modules is a real win. At present it is heating my room over night (see image on right).

Some limitations of ducted systems

Having now tried two ducted systems, they are a little different than the wall mount I have been used to, and some things still hold true for that.

Both systems had few fan settings. The Mitsubishi had 4 levels, but only the top two actually ran the compressor, the first two just blow air, so very limited. The Daikin has 3 levels. The wall mount Daikin has 5 levels and "auto" and a "night" mode. I'd love a "night" mode on the ducted systems to be honest, but looking in to noise attenuators possible, or just getting used to it.

Another caveat is that a ducted system, having vents in the ceiling, it can take a while to heat as the heat fills from the top of the room - this creates a noticeable lag in heating at bed level. The wall mounted unit is much better at this as it able to direct the airflow down and create more circulation.

The proof of the system

The real proof will be in the summer, and we will see. Tests so far suggests it just works, and works really well.

Ooops

Almost forgot, as people will ask: It cost around £10k and took a week to install.

Part 5

2022-04-07

New air-con, part 3

Before I give the run down on the new air-con, I want lots of nice graphs showing how the temperature works, and these take time. The simple summary is that I am impressed. So more in part 4, and lots of photos.

But in the mean time - my little WiFi modules for the Daikin air-con. They work really well, and I have the temperatures coming in now. I am sure there will be some fine tuning.

I also have a web interface, to allow simple local control. I have worked hard on the niceties like easy setting WiFi client mode and so on - this being an areas where the Daikin modules really sucked. These are really annoying fiddly things with web sockets and wifi client connects and DHCP and all sorts - really silly small things that take all day. So slow progress for a change. But this should be really good.

So at this point the idea is that these WiFi modules allow local (web) control, and MQTT control which can be local or external and even secure mqtts if needed - ideal for building management, and no "cloud" shit via a third party. That is working well. A nice touch would be to support the old Daikin http URLs as well, which I may yet do.

But there is more...

One of the things I did in my old house was rather convoluted. It was an MQTT connected app on my linux box that poked the http URLs on the old Daikin WiFi module to provide some MQTT access and control. That combined with a separate tool on my linux box that talked MQTT to that app and the environmental sensors. The result was a really neat and tight temperature control using the environmental sensor as the reference. But it did mean tuning these background tasks on my main linux box.

However, I am taking a new approach now - the WiFI modules talk MQTT directly. And the environmental monitors have evolved to have a time profile temperature for controlling central heating as well. That works well with a Shelly Plus 1 (well several) doing heating and water and so on. So the new approach is that the environmental monitors report over MQTT directly to the WiFi control modules - saying what temp they see now and what target they want (or min+max if needed).

(I had a slight issue that heating is set off in bedrooms during day, as you expect, but with a min of say 18C, which is fine for the central heating, but the air-con meant it though that if that was turned on it had to cool to 18C. I have since made it have a wide range define for idle times to avoid the air-con being silly).

The WiFi module then has an local auto mode override. Much like the wired remote which tells the a/c to be cool or heat with appropriate targets, rather than trusting its auto mode, my module can do the same.

But, as always, I reinvent even my own wheels. The direct access to the a/c makes it much more responsive, so I can create a much nicer algorithm. It is always fun making any control/feedback loop system, and more so when you are second guessing the system you are talking to. Some experimentation, and a lot of settings to allow fine tuning, and I found I have to tell the a/c to heat or cool 1.5C beyond where it things it is before it will turn on or off the compressor as required. So I can compensate for its hysteresis and apply my own rules.

Obviously for efficiency you want to avoid rapid heat/cool switch overs, so I have temperature and time controls for that. But I can tweak the target temperature in real time to make it do what I want.

This is a good example, it is my office during the day today. And we have a fun case where this time of year the temperature now is close to what we want, in this case 21C. So no aircon may be better. However it is a good test of the algorithm to test in this edge case of spring/autumn - when it is really hot outside or really cold outside is an easy case.

What is interesting is that it actually went wrong. At 13:40 ish it switched to heating (the heavier line), and it should not have. I have since found the edge case, the temp only just touched the target on previous cycle, not passing it (difference of > and >=) which meant it thought it had been under temp for over 15 minutes which is enough to trip to heating. I also have a min time it stays heating or cooling, but had been cooling all day (starting 7am). I have since fixed this, so today it would have stayed cooling.

Even so, it is otherwise keeping within around 0.2C or 0.3C of target temperature. Basically it should have wandered off below the line for a while, i.e. the room naturally cooler than 21C, before it switched to heating. We'll see that in the autumn now, or who knows? Maybe next week. This is Wales.

Just to be clear - we are not turning it off and on, or changing between heat and cool all the time, this is just small adjustments to the target temperature and letting the Daikin a/c decide what to do as a result.

What is also interesting is the power usage. When installed on 1st, I was using the controller remotes, not my own code, setting a temp in auto mode. Even the early WiFi module code on 2nd and 3rd was not doing this smart control. The result was a lot more power usage.

As I refined the code over the last few days, making a big difference when I started on the 4th, it has ended up much more efficient. Today, for example...

We get solar in next week, which will provide enough power to more than cover this, thankfully.

But the result of all this is my environmental monitor and air-con Daikin WiFi control modules allow much nicer control. I think we may have to start selling them :-)

Part 4

2022-04-02

New air-con, part 2

Again, not actually blogging on the system as a whole - it is impressive, but not finished until next week.

One aspect of the system is the Daikin WiFi module. It is a plug in thing for the ducted units, and built in (but still a unit on a wire in a slot) for the wall mount unit.

It used to be that Daikin WiFi modules worked locally, on the (WiFi) LAN, with an app, and have a rather easy to use http based API with which loads of software is already designed to work. There is a big open source community one this.

Sadly the latest version is different. It is "cloud based", not local control. Seriously, why do this? I mean, as an "option", OK, but killing local control is not good. This really is not good Daikin. I do not need "cloud control" (aka "dependancy") for things in my home.

Also, weirdly, it broadcasts its SSID even when on my WiFi, which is also stupid. I won't want it advertising or being vulnerable. So no!

As a result, today, I decided to tackle this issue.

Reverse engineering!

I decide to look at the connections it has to the main unit. They look simple. Checking with a meter I see DC around 17V, and a couple of wires. There was also a 5V line, but not connected. So looks pretty simple, GND, DC, and two signal wires at around 5V. I could have laid bets on the signals being 9k6 serial data, and they are. What a surprise.

So, oscilloscope, and we see, they are indeed 9k6, even parity, 1 stop bit, serial data, half duplex (poll and response) packet protocol.

So, what next, well.. Some debug...

With the serial data now connected to an ESP32, and some logging, I was quickly all to dump packets of data sent. The format did not look complex, some headers, length, a simple checksum, and so on.

Of course, using the "cloud" system I could generate commands, and dump them. I quickly worked out how I set the temperature, the fan speed, the mode, and so on.

I have a load of status responses too, that need a bit of work - various temperatures. But not too hard.

So next step is trying to emulate the controller myself. One issue is the signals are all 5V and my stuff is all 3.3V.

However, the ESP32 can generally cope with 5V coming in, and 3.3V seems good enough for the air-con to see the 1's and 0's. So good enough for a proof of concept. A proper board will need some protection from the 5V, which is not hard.

The new controller

The new controller was made from a simple generic board to start with. I now have designs for a "proper" board, but this was good to prove it works.

The board is small! A fraction of the size of the Daikin module. But it works! I can power on/off, set the temperature, the mode, the fan speed, and so on.

So now to tidy the code, document it, do more tests with a wall mount unit with a lot more settings, make the PCB design and order some samples, and so on. Much to do.

I also want a nice web interface, nice MQTT interface, and maybe even make it backwards compatible with the older Daikin WiFi modules to allow a variety of apps to work. Oh, and stop sending its SSID when on-line locally!

But making a new Daikin WiFi aircon control module is not bad for a Saturday, and still time for hot tub, and curry.

It is all open source, and on GitHub, even if a bit of a work in progress. But yes, I think this will be a useful product.

P.S. I then found the wall mounted unit is a different model that talks a completely different serial protocol at a different speed, so spent Sunday making that work as well.

Part 3

2022-04-01

New air-con, part 1

As you will know from my previous posts, having moved to Wales (over a year ago now), I wanted air-con installed. I had this in Bracknell and am very used to it. Also, last year, it got stupidly hot. The good news is I am also installing solar panels and battery which should cover the power usage of air-con in the summer, and a lot more. More on that later in the month.

Last year we got air-con, and after months of faffing, it was finally taken out. It was simply not good enough in a lot of ways. I promised a blog on this, and you will have one, next week, when the new install is finished. But I can say it is very very promising!

However, today, I am blogging on the Daikin WiFi adapters.

Oh my, this was hard work!

The ducted units appear as WiFi access points, and there is a label and even removable sticker with the SSID and the passphrase. It even has a QR code, yay!

The QR code is quite dense, but guess what - it is not a WiFi connection code which your phone would understand and connected to the WiFi, no, it is just the "KEY" (passphrase) which the phone naturally thinks is a phone number. Why do that?

Connecting to the WiFi AP gets an IP, good, and there is a web page on the device IP, good. But it is just a set of free s/w licence details. No actual web interface. Just a simple page to allow setting the SSID and passphrase as a client - that's all it would need in an ideal world, but no. They could even make DNS such that it appears as a "splash" page when you connect on most phones. Not actually that hard. Shame.

The good news is that there is an app. And the instructions say to use the app. They have a QR code, but it just goes to apps.daikineurope.com which helpful explains you need the "Daikin Residential Controller" app. No helpful link to get it - no, that would be too simple. There is no "Daikin Residential Controller" app! There is a "Daikin Online Controller". There is an app called "ONECTA". There are a lot of third party apps too.

The Daikin Online Controller app does not work, but it does have step by step instructions on how to get things to connect, which I tried. They don't work. Lots of on-line help has the same, even videos. Things like "Hold MODE for 3 seconds" on the wifi module on the device, to make it show "AP" light. Well these units were clearly being APs, but the AP light was off, and pressing MODE did nothing. Very annoying.

I also have a wall mount unit, and the instructions are holding a button on the remote for 7 seconds, and then selecting a number. Again, that just does not work. Now, I know that worked in my old house with Daikin wall mount units. Again, very annoying.

It turns out "ONECTA" is the app you need and the old app does not work at all. Arrrg.

But then it insists you need an on-line account on some cloud services - not amused, but I was hopeful that once on the WiFi here I can do stuff directly and just kill off the app later. So went ahead.

If connected to the AP from the air-con the app "sees" it right away, great. You select, and it connects to the device, and then to the cloud service, which obviously does not work as the phone is not on the Internet - it is connected to the device. If you swap WiFi a bit you can progress more, but ultimately you cannot actually get it working.

I found loads of on-line help, all of which appears to be based around the older app, which no longer works.

Eventually I found you can manually add a device on the app, and if you manage to pick the right options you eventually get to ping pong talking to device and your normal WiFi and it will put the device on the wifi. Finally. Hard work or what?!

Worryingly the app wants to know where I am so it can check local weather - why? The temperature I want my room does not depend on local weather. Worrying.

The app also insists I change to indoor control for temperature and not the wall mount controllers I have. Well I want to use the wall mount controllers for temperature, so really not sure about that!

Anyway, I have ducted units on line now, but what of the wall mount air-con unit? It is not appearing as an AP even. Well, thankfully the manual adding instructions on the ONECTA app does explain - you take the cover off, open a flap, pull out a wifi controller module (looks just like the ones on the ducted units). But on this one you *DO* have to press MODE for 3 seconds and the AP light comes on. WTF? I now have that unit on-line too.

The Daikin units used to have some simple http based APIs that allow basic control. Loads of details all over the internet. Guess what? They don't work. So this will probably mean some reverse engineering.

That's enough for today.

P.S. the wall mount controls for the ducted units have bluetooth and an app that just works quite nicely with them without any hassle. Also, the previous air-con attempt had neither WiFi nor Bluetooth - so whilst this may seem some hassle, it is already a massive improvement!

P.P.S. (Thanks Matt) WHY OH WHY do they still broadcast the set up SSID even when a client?!

Part 2

2019-04-08

This is cool

Finally (I think) I have my daikinac app working as I want it. It is on GitHub (here). Apart from simple control via MQTT, it proves me with much better temperature control. It has taken days to do this, coding and testing over night typically. One day was wasted as the temperature sensor had fallen on the floor and my algorithm was trying very hard to change the temperature of the carpet under my bed (arrrg!).

Why do this?

  • Fun, and interest, as always
  • Comfort - air-con controls are annoying, they allow temperature to be out by well over 1℃ and I notice that.
  • They are also crap at an "auto" mode and don't change from heat to cool sensibly (e.g. can be 2 or 3℃ out before they do it), hence I have to change manually in spring/autumn during the day.
  • Saving money by better controlling when they are on and off as part of home automation.

The result:

±0.2℃ of target. (Red line is measured temperature) Mostly ±0.1℃. Measured using a device with only 0.1℃ precision.


How it is done...

Basic logic is checking the settings and info from the air-con every minute using http, and collecting temperature from a separate thermometer via SNMP. This is place by the bed (i.e. where I want the temperature set).


The basic algorithm involves having an offset from the target temperature, and sending that to the air-con as its target.

Initially, and after any change of mode or fan rate control or my target temperature I allow 15 minutes for that to settle and then start collecting measured temperature. Once I have 10 minutes of data I consider changes to the offset. I collect up to an hour to track a moving average.

If the data shows a minimum above the target or a maximum below it, i.e. "way out" I make a step change in the offset to bring that in line, and flush the data and wait 15 minutes to settle again.

If the min/max cover the target, then I adjust the offset by a small amount (0.01℃) based on the average being higher/lower than target.

This all keeps the temperature averaged at the target and allows for any temperature difference from air-con unit to where I am measuring. Normally this is very low (with windows closed), e.g. well under 1℃. However, with a window ajar to allow fresh air this an be several degrees (I now have a nice heat exchange fan in the room instead, so windows closed).

Hysteresis

Unfortunately the air-con is not quite as good as I would like. It does lower power as it gets closer to the target, which is good, but ultimately when the temperature drops passed the target it will engage the fan and compressor and push the temperature 2℃ beyond the target and then allow it to settle. This cycle can mean a compressor on for maybe 5 to 10 minutes and repeat every hour.


What I have done now is recognise when it is doing this and kill the compressor. Once the compressor is on and the temperature crosses back past the target I turn it off by setting a target 3℃ before the target. This means we "overshoot" by only 0.1℃ to 0.2℃ if at all.

The result is the compressor on for up to a minute maybe every few minutes (depending on how har it is having to work to maintain temperature). I don't know if this change in duty cycle is detrimental or not. It probably means less usage overall as we are not overshooting the target temperature by 2℃.

Noise

One concern was noise, but even in night mode I can hear a ticking clock over the fan - the compressor and fan going on/off happens anyway, just more often now. Works well.

Other bits

If the offset to be applied is getting too high and not working, we switch from quiet mode to normal auto fan mode as clearly it needs more oomph.

If the offset to be applied is getting too low and not working, we switch between heating and cooling.

Comfort

The thermometer may well have a level of error, obviously, but I am not trying to do a physics experiment here. I don't really care as long as it is consistent and precise as ultimately the target temperature depends on comfort. It can be impacted by lots of things like being unwell, or just coming in from hot or cold outside. However, I now have a reliable way to set a temperature and then make any relative adjustment for comfort.

2019-04-03

Setting the temperature

I have upgraded the aircon in my bedroom as the old one broke, and have a nice new Daikin one (as I blogged). I can control over wifi, which is good.

Even though this is way better than the old unit I had, it still suffers from a couple of problems.

Firstly, the good thing it does is finely control the power and fan so that as it gets close to target temperature it lowers the power a bit, and ends up staying on target pretty closely without oscillations. Excellent.

One problem it cannot solve though is the there will be a temperature gradient in the room, not just top to bottom, but also potentially quite a lot if you have a window open a bit to let in some fresh air and ensure the CO2 levels are sensible. Outside was actually below 0 this morning!

The other small problem is that the "auto" mode is not good at some times of year when it will wait until several degrees over target before switching.

To solve the first problem I have an SNMP thermometer with a sensor on the side of my bed where I sleep. This allows me to nicely graph the temperature for a start.

This also lets me take control of the air-con.

First attempts

The first attempt involved doing the job for the aircon - setting the power based on the temperature. However, I cannot do that directly, I have to set the target temperature relative to current temperature to force it to work out a power setting. This took several iterations to get reasonably right.

At one point I was in fact oscillating so much I even had it switching to cooling after it overshot on heating, and then back again later.

But finally after a lot of testing (mostly leaving it for an hour or so on latest algorithm while I did other stuff) I got it oscillating within around ±0.5℃ or so. I was pleased, and slept on it (in a nice temperature controlled room).


On this graph, y-axis is temp in ℃ intervals, x-axis is time in hours, black is target, red is measured temp, light red is setting temp on aircon. The green is reported temp from aircon which I suspect is a separate sensor and way off. So mostly the measured temp was within around ±0.5℃ once it had settled a bit at the start.

Then I had a brainwave..

Finally working (well, so far)

The aircon itself does a better job, holding a much more stable temperature without much oscillation. So use that! I decided to keep a moving average of how far out the setting temperature was from the measured temperature, and use that to add an offset to the target set on the aircon. It only allows settings to 0.5℃ so I added error dither as well.

This works a treat, and allows me to set the aircon allowing for the temperature gradient in the room automatically. The only minor change I made was to offset the averages by a few minutes to allow for the fact that the set temperature does not immediately change the room temperature - so as to better track the actual temperature difference. I was somewhat fooled by how much it changed during the day when sun light hit the room, etc, but I should have expected that.


Here, by using the aircon to control the level we have a smoother temperature. This was in the evening as the outside temperature dropped and so the level to which the aircon had to be set was gradually increased to maintain the measured temperature. Again, within 0.5℃.

The result is all on GitHub (here). It includes MQTT daemon as well (which is how I tell it the air temp from SNMP).

Update: This worked well when the aircon is fighting a window that is ajar. Now I have my new fans installed and windows slows it is oscillating ±1℃, because it is effectively turning on and off at a low level. So I am working on the older method if I find we are doing that. We'll see how it goes. Github updated as I go.

2019-03-24

De-clouding IoT

There is a lot of IoT (Internet of Things) stuff these days, and it is impressive what you can do with home automation - linking sensors and devices and command speakers and phones and all sorts. It is even impressive that third party linking services like If This Then That even exist now!

A lot of these devices make use of The Cloud in one way or another, but not all, and not all to the same extent. This is both good and bad, and represents something of the age old compromise of security and convenience in a way.

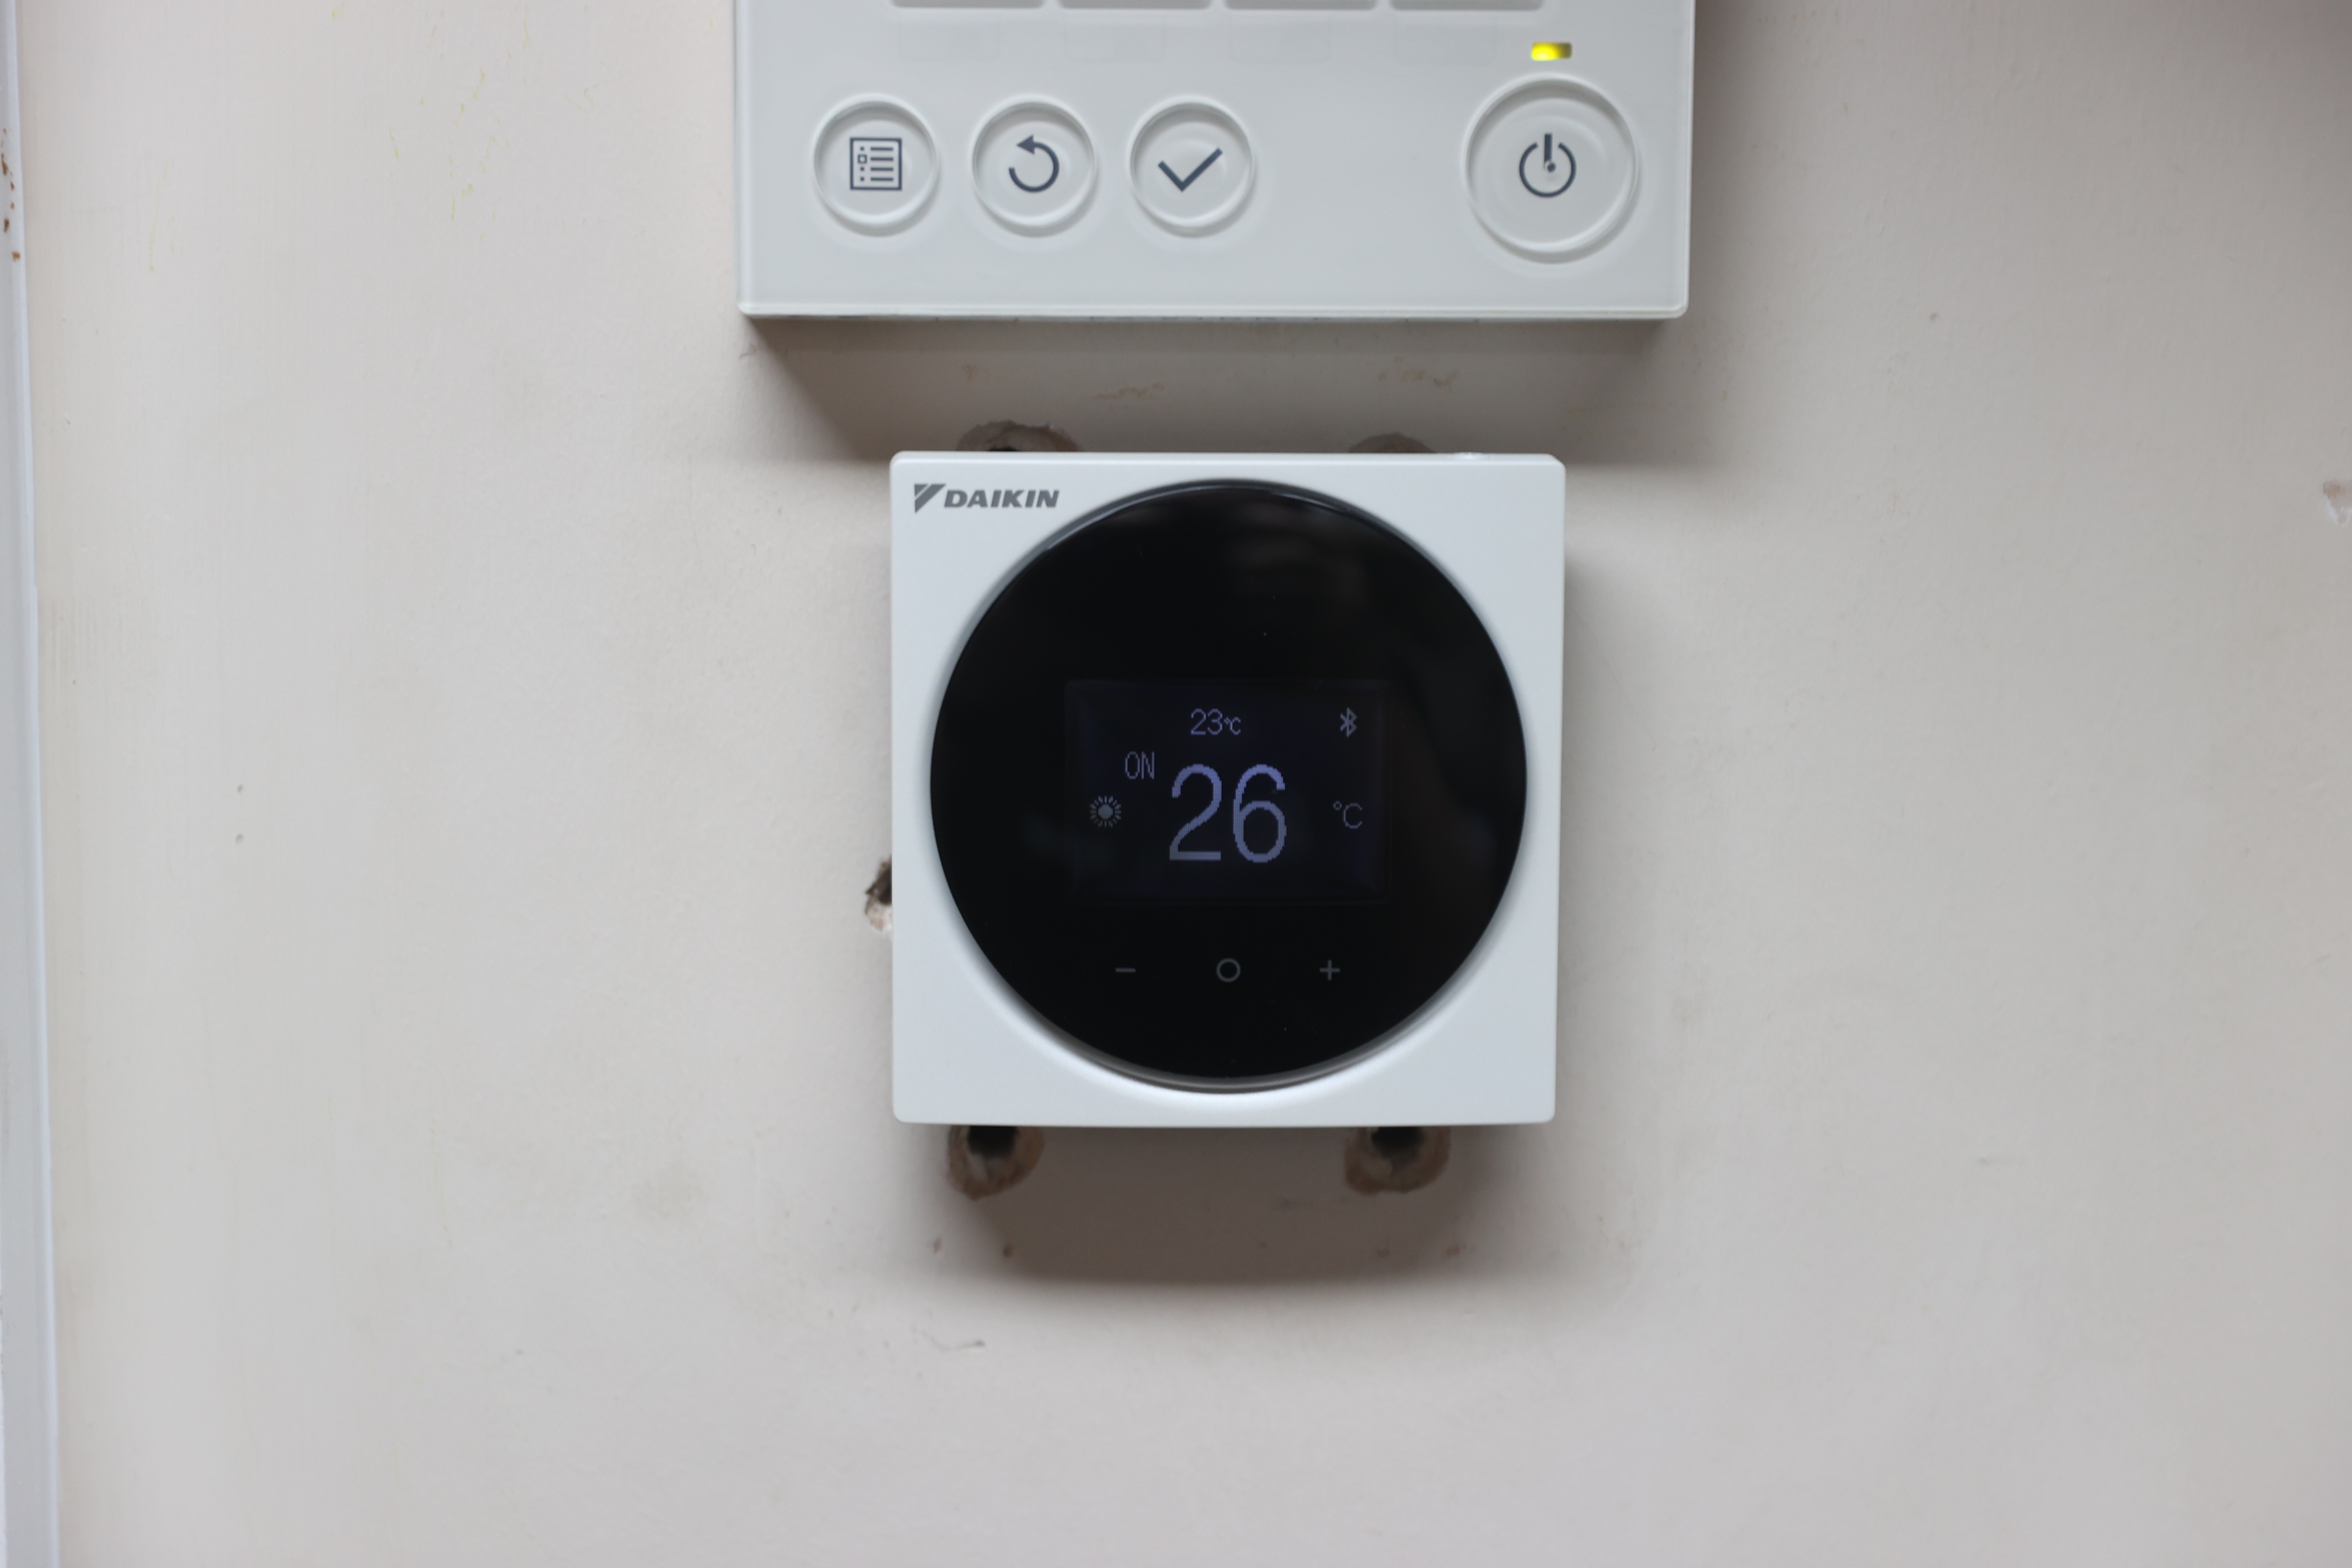
Today I am playing with three devices: A Daikin air-conditioning unit (as per my blog), a Withings Sleep monitor (as per my blog), and some new SONOFF switches. All have different approaches. All work with IFTTT, so if I was happy to just use the cloud, this would all be simple.

What's wrong with the cloud?

Convenience

The first thing that is right with the cloud is the convenience - simply connect a device, load a phone app, set up and it is working. Devices that live on your home WiFi and talk to servers on The Internet do tend to just work and be easy to use. But this convenience comes at a cost...

Privacy

One of the issues is privacy - the data from these devices is going to third parties - companies you don't know, or may not even know which country they are in. Often the "service" they provide is not something you even knew was needed when buying the product and is some separate "agreement". GDPR should make your data safe, but it is a law not a technical means. They may not understand GDPR (Withings clearly don't, and have been reported to the ICO). Even if they do understand GDPR you have no real way to know if they are following it properly, or if they will ever get hacked.

The main way to ensure privacy is to keep control of your data. A cloud based service inherently takes that control away.

Reliability

If a device needs the cloud to work, that is also a problem. Even the Withings Sleep monitor, which is totally cloud might seem like it is not an issue if your WiFi or Internet is down or they are doing maintenance on their servers, etc, but when you use the real-time triggers for getting up or going to bed to work the lights and heating and so on, suddenly it matters.

With locally connected and controlled devices in your home you can remove that reliance on the Internet and The Cloud, but at the cost of a single point of failure and equipment you have to maintain.

You also have to allow for the fact that this is most likely a free service, and something they can stop by choice, or because they go bust, or even politics between countries, and suddenly your devices are useless.

Adding extra parties like IFTTT just adds to the issues.

Security

Finally security - this is a huge issue with IoT. "The S in IoT stands for Security".

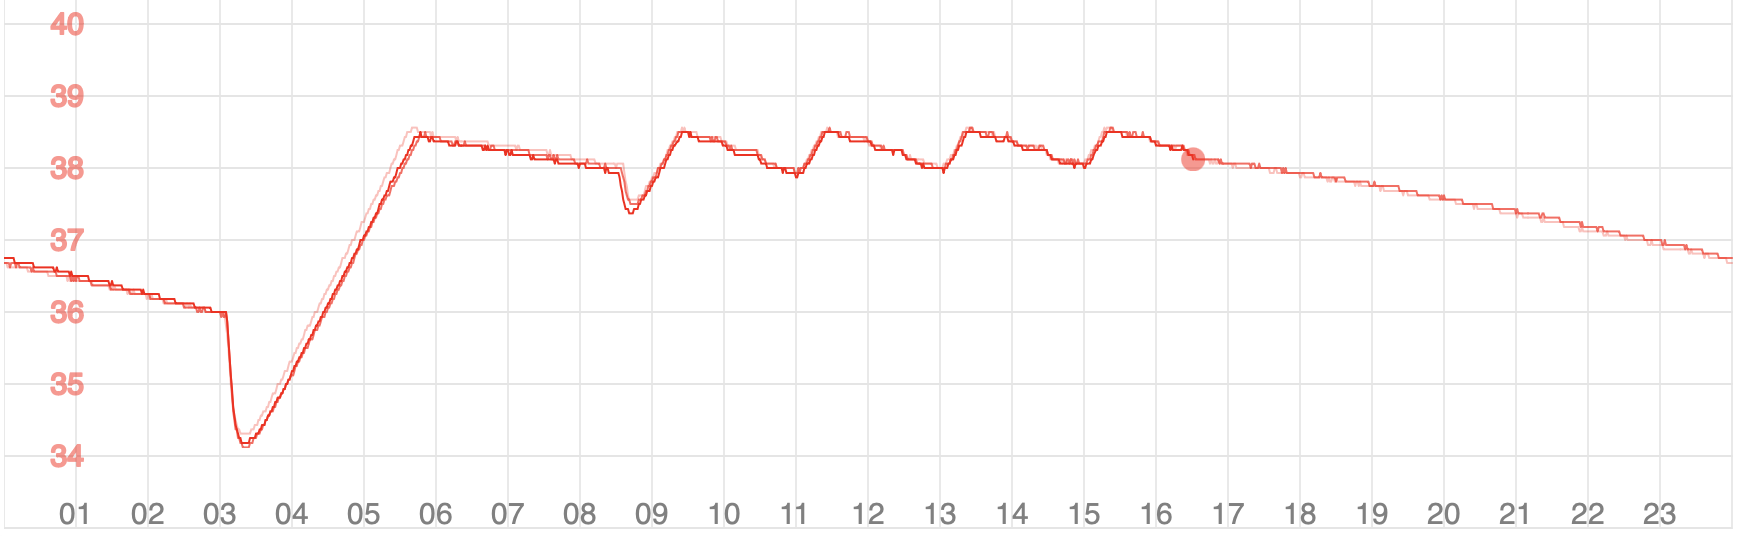
The Daikin air-con have no security - simple http requests. Even if there was a password it would be easy to snoop. It means anyone on your home network / WiFi can access the air-con.

Does it matter? After all anyone with a remote can do the same in the house or even from outside through the window (stories of someone turning on neighbours air-con through the letter box whilst they are away so heat rises to their flat and saves them money). But is it a big deal? Well, remember, this is not just about you - if someone could control all air-con in a country they could make them all turn on at the same second and cause a major power blip? They could monitor when you are in and not and break in when not. It is not so simple.

But they need to be one local network / WiFI? Well, no, they just need a compromised broadband router or compromised device (a lot of IoT is very hackable) on your LAN, or even some background secret function in some popular phone app. It is not as hard as it sounds.

So security of IoT really needs to improve.

What do I mean by de-clouding?

Basically I want to have devices I control, and home automation I manage using my computers in my home without using The Cloud. I can set up any remote access I want with a secure VPN. I then control my systems, and control my data. It means I have to maintain a machine, but I do that anyway, and it is not that hard - could even be a Raspberry Pi or some such.

Daikin

As per my blog, this was simple - no authentication just local http - it has no security.

The good news is that it makes it simple for me to lock down on separate WiFi SSID and VLAN and easy for me to write my own controls.

Apart from a lack of security, the other failing is a lack of documentation. I'd prefer if the API was actually documented - why not, Daikin?

Withings Sleep

The Withings Sleep monitor was more of a challenge - the security is trying with this one.

The device does an HTTP request to fetch the public key used for HTTPS, but includes its MAC and a random challenge in the request and gets a digest in the response. Any change to the response key, or even the request MAC causes it to abort and start again (DHCP, DNS, HTTP, etc). So it seems there is likely to be a per-device key check on the response and as such I cannot simply replace the public key returned. It then checks the public key on the HTTPS.

So yes, I am stuck. The good news is that it does do IFTTT and that can be linked by creating an applet to a webhook to poke my own server for triggers. Sadly this is not direct from the device, but via Withings, so no chance to intercept / hack that either. It has all the disadvantages of cloud and local servers combined, but does mean I can then control the actions I take directly - such as changing air-con settings, turning lights on/off, etc.

SONOFF

I was inspired by a blog post (here). It seems SONOFF are very cheap and very popular, even with alternative code that people flash in to the units. However, the security is poor in the first place meaning one can control them off-the-shelf. This is bad for security but good for de-clouding them.

First off, the simple in-line power switch (e.g. for lighting circuits) - which I have connected to a table lamp (purchases especially for this test, and obviously pixar style).

It was incredibly difficult to see the AP mode SSID pop up and connect to it, and I wonder if you just have to try several times. You long hold the button and it shows up if you are lucky (ITEAD-1000xxxxxx with password 12345678) But then the /device and /ap http commands work as explained in that blog. It seems serverName can be a host name.

As expected it then connects https. Unfortunately, even where the server has proper https and the name matches, it is just closing the connection after getting server certificate details. Arrrg.

Reading some of the comments, it seems I am not alone - even with a valid (LE) cert, the sonoff is not happy with the https negotiation. Grrr.

This sort of leaves me either using IFTTT and cloud, again, or re-flashing the code. Not amused.

What I think would help...

Firstly I think all IoT needs better security - maybe there needs to be a testing standard as part of compliance for CE marking (scary).

But also I really think the APIs should be published. This would allow devices to work directly with IFTTT or competing home automation systems or local controllers.

At the end of the day the closed approach, and forcing all data via the cloud maybe made commercial sense when companies could collect and use all that lovely personal data. GDPR kills that business model, and even makes having that data a potential liability! So please, let's open the APIs (securely) to allow more competition in the home automation market.

Oh, and don't forget support of the current IP protocol (IPv6).

Update: Current plan is to re-flash SONOFF. I'll blog more on that soon.

2019-03-04

Daikin Air-con WiFi control

One of my air-con units was sufficiently ill that we gave up and changed it, and now I have a nice new Daikin one with WiFi control via a phone App.


The WiFi sticker that came with it had a QR code which was oddly not the WiFi login, even though iPhones understand such things, but I got it on to my WiFi (only 2.4GHz by the look of it) and all working with the app on the phone - nice.

What is nicer is poking it using curl. It has a noddy TCP stack and http interface (not https) which makes it very easy to script stuff. Several people have done this, but I have not found quite what I was looking for, so some poking around.

So, here goes, what I have found so far (subject to updates).

Sensor info

A simple get of /aircon/get_sensor_info gets :-

ret=OK,htemp=20.0,hhum=40,otemp=9.0,err=0,cmpfreq=26,mompow=2

Which is nice as it has room temp and humidity and external temp to 0.1C precision.
  • ret: A return status, with OK being good, it seems
  • htemp: Inside temp in C
  • hhum: Inside humidity, I assume in %
  • otemp: outside temp in 
  • err: I assume an error setting
  • cmpfreq: I am guessing compressor or fan frequency
  • mompow: Not sure, was 1 when idle and when heating, 2 now we are cooling

Control info

This is where it gets useful, a simple get of /aircon/get_control_info gives

ret=OK,pow=1,mode=4,adv=,stemp=30.0,shum=0,dt1=21.0,dt2=M,dt3=18.0,dt4=30.0,dt5=30.0,dt7=21.0,dh1=0,dh2=50,dh3=0,dh4=0,dh5=0,dh7=0,dhh=50,b_mode=4,b_stemp=30.0,b_shum=0,alert=255,f_rate=A,f_dir=0,b_f_rate=A,b_f_dir=0,dfr1=B,dfr2=5,dfr3=B,dfr4=A,dfr5=A,dfr6=A,dfr7=B,dfrh=5,dfd1=0,dfd2=0,dfd3=0,dfd4=0,dfd5=0,dfd6=0,dfd7=0,dfdh=0,dmnd_run=0,en_demand=0

What I have worked out so far :- 
  • pow: Power 1=on 0=off
  • mode: 1=auto, 2=dry, 3=cool, 4=heat, 5=?, 6=fan, 7=auto
  • adv: blank normal, 2=powerful, 13=streamer, 2/13=both
  • stemp: Set temperature
  • shum: Set humidity
  • dt1/2/3/4/5/7: Target temp for each mode
  • dh1/2/3/4/5/7/h: Target humidity for each mode (and h?)
  • alert: ?
  • f_rate: Fan rate A=Auto, B=Quiet, 3 to 7=speeds, 
  • f_dir: Fan direction 0=fixed, 1=vertical, 2=horizontal, 3=both
  • dfr1/2/3/4/5/7/h: Per mode something, not sure
  • dfd1/2/3/4/5/7/h: Per mode something, not sure
  • dmnd_run: Not sure
  • en_demand: Not sure
  • b_setting: Not sure

Control setting

Setting is a simple get /aircon/set_control_info?pow=1&mode=4&stemp=29&shum=0&f_rate=A which just responds with ret and adv.
The settings are as above.

So a simple cron to turn off at 06:35 is :-


35 6 * * * curl --silent 'http://x.x.x.x/aircon/set_control_info?pow=0&mode=7&stemp=21&shum=0&f_rate=B' | grep -v OK

QR abuse...

I'm known for QR code stuff, and my library, but I have done some abuse of them for fun - I did round pixels  rather than rectangular, f...